Sub Resources (Axe Throwing - Bowling - Smash Rooms - etc)
The Sub Resource Grouping feature is to allow you to link multiple activity spaces to a single product, in which the system will look to see what activity space & time is available to book on.
For example:
If we have 6 axe lanes, we can link all 6 to a single Resource Group (Parent), and each lane will be considered a Sub Resource (Child). The concept is that the AI Scheduler will look to see which of the 6 lanes is available to book on for the guest to make the booking possible.
TABLE OF CONTENTS
- Step 1: Create Resource Group
- Step 2: Create Sub Resources
- Step 3: REPEAT!
- Step 4: Resource Group Products
- Step 5: Schedule Rules
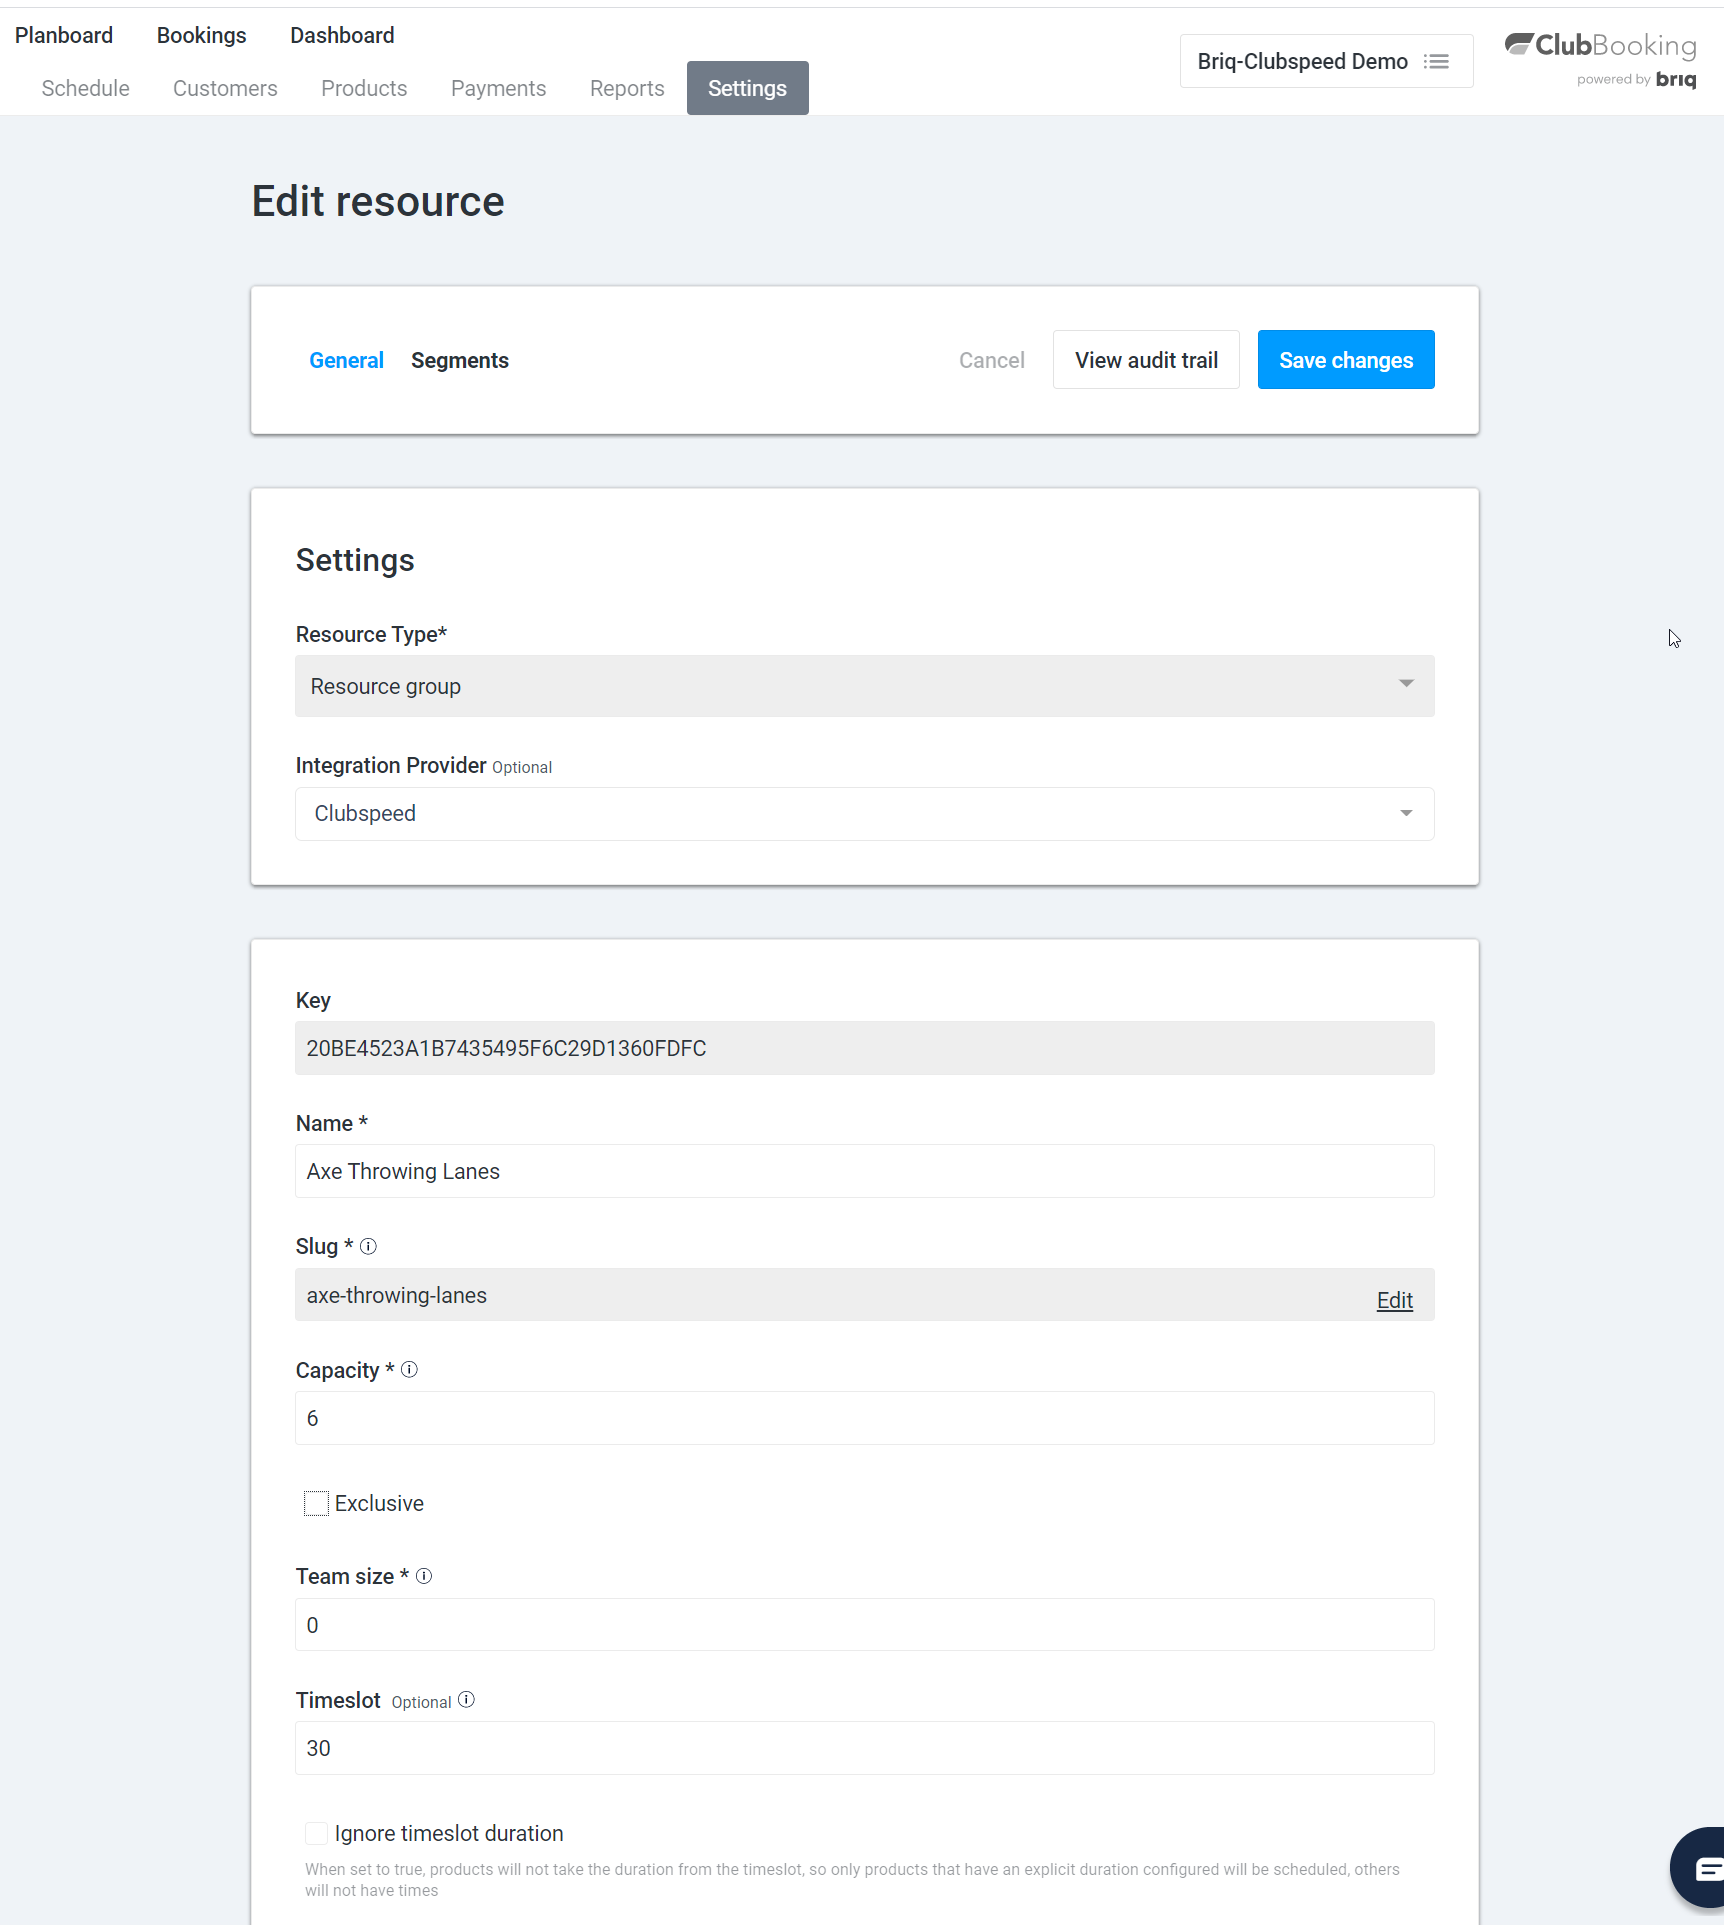
Step 1: Create Resource Group
// Navigate to your Briq.app > Settings > Resources
- Click on New Resource
- Resource type = Resource Group
- Integration = Clubspeed
- Name = Display name for filter activity (Axe Throwing, Bowling, or Rooms, etc)
- Capacity = How many participants per room or lane
- Exclusive = Check if only one group is allowed to book per room/lane
- Timeslot = Enter lowest common denominator (EX: 30 minutes, for 30 - 60 - 90 - 120 minute activities
- Segments = Set the correct visitor classifications if necessary ( IE: Adults Only!)
- SAVE!
- NOTE: These settings will be default for ALL SubResources connected to this Resource group!
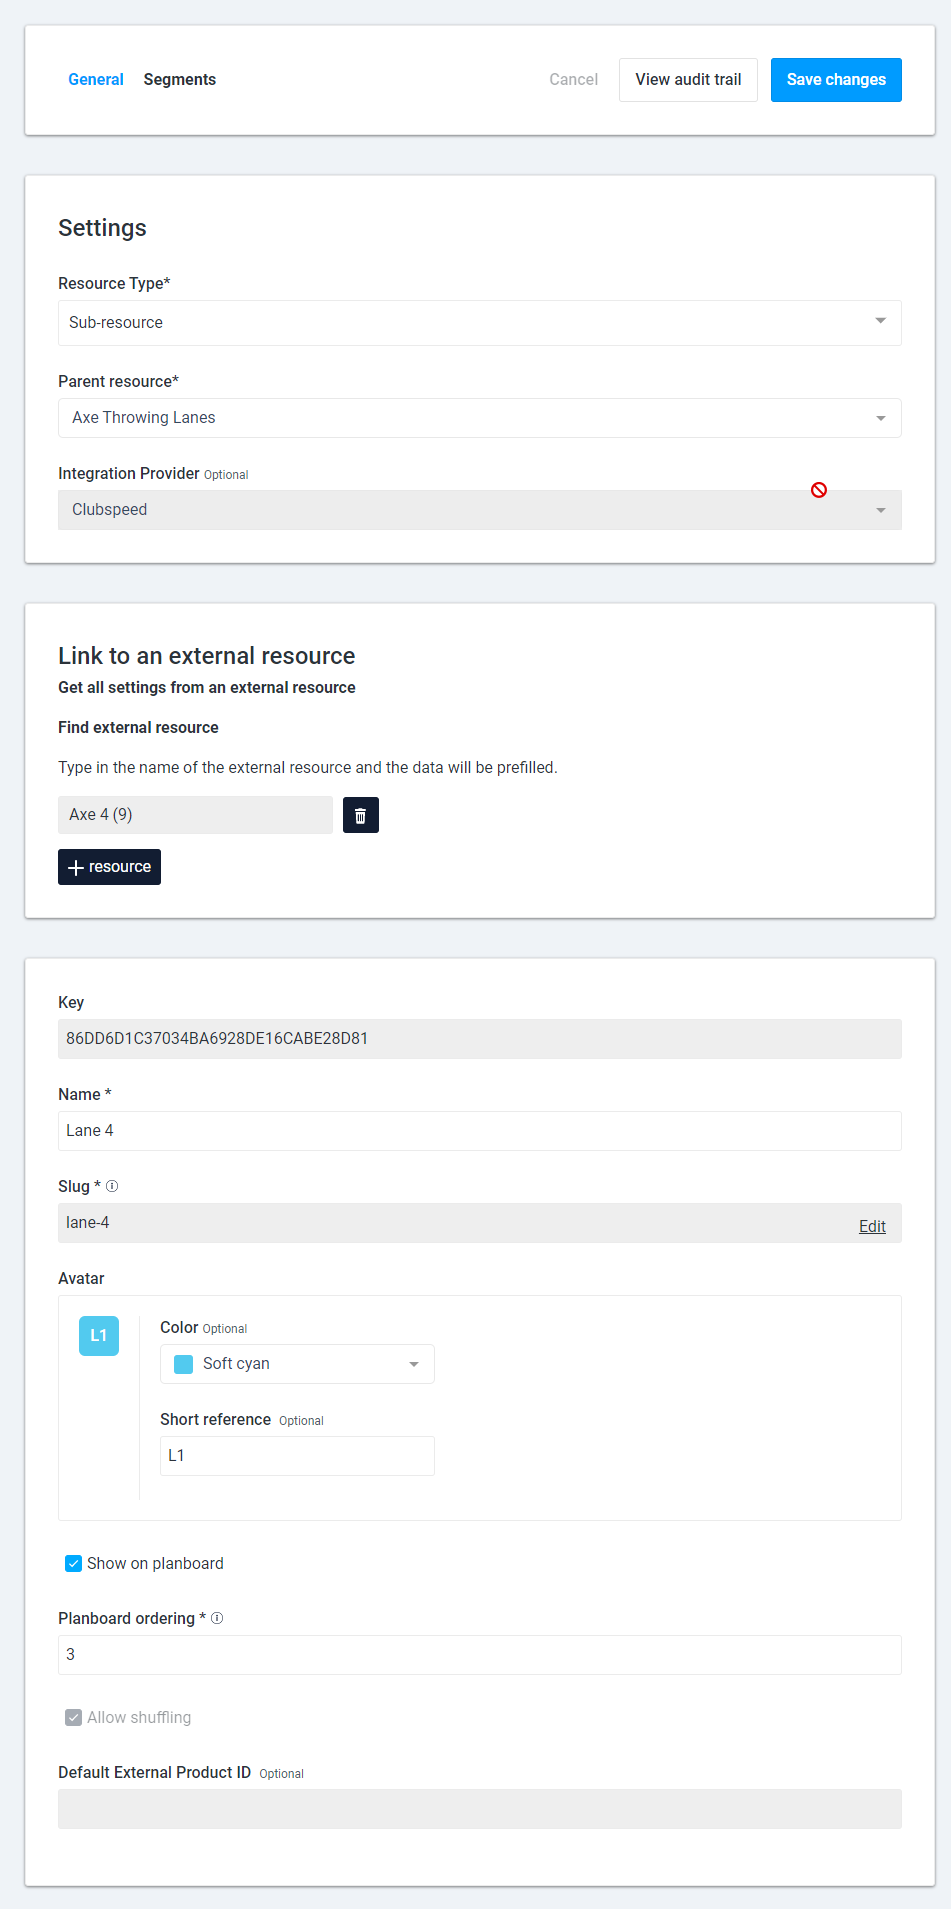
Step 2: Create Sub Resources
// Now let's create and link your sub-resources to your resource group
- Click New Resources
- Resource type = Sub-resource
- Parent Resource = Select name of Resource Group you created in Step 1
- Integration Provider = already select (Clubspeed)
- LINK to an External Resource = Select the first Venue in CS from the list (IE: Axe Lane 1)
- Name = Give this resource a name (can be same as above "Axe Lane 1")
- Avatar - Color = Choose a color
- Avatar - Short Reference (This is for the Planboard, 2 characters only!) = Example "L1"
- Show on Planboard = Required - must be checked to be active!
- Planboard Ordering = enter in the # in which you would like this resource to show on the planboard (IE: 1st, 2nd, 3rd - etc)
- SAVE!
Step 3: REPEAT!
// Repeat Step 2 until all lanes or rooms have been created.
- This is what your resources should look like when you are finished!

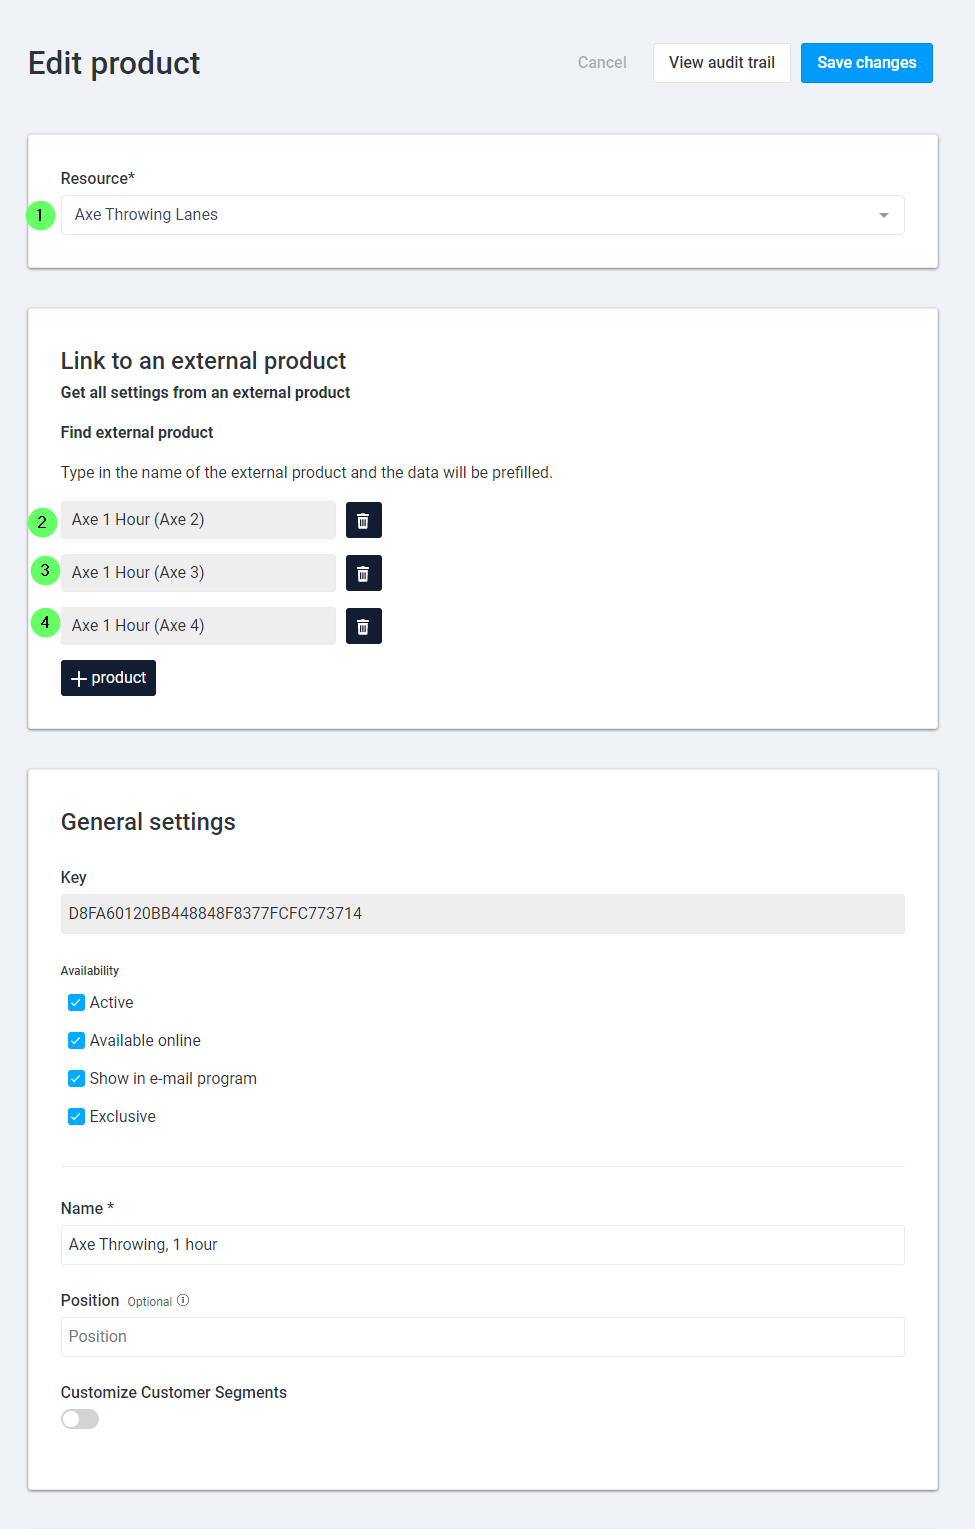
Step 4: Resource Group Products
// When you create your products, you want to link to the main Resource Group
- Link to External = Link to each activity room/lane
- 60 minutes (Axe Lane 1)
- 60 minutes (Axe Lane 2)
- 60 minutes (Axe Lane 3)
- The AI Scheduler will reserve the activity sessions in CS in the order you add them to the product based on availability.
- EX: If you add lane/room 4 first, then it will always try to schedule in that calendar/venue of CS first. If that timeslot is taken, it will go to the second lane/room that you have linked to the product, and so on until it finds availability.
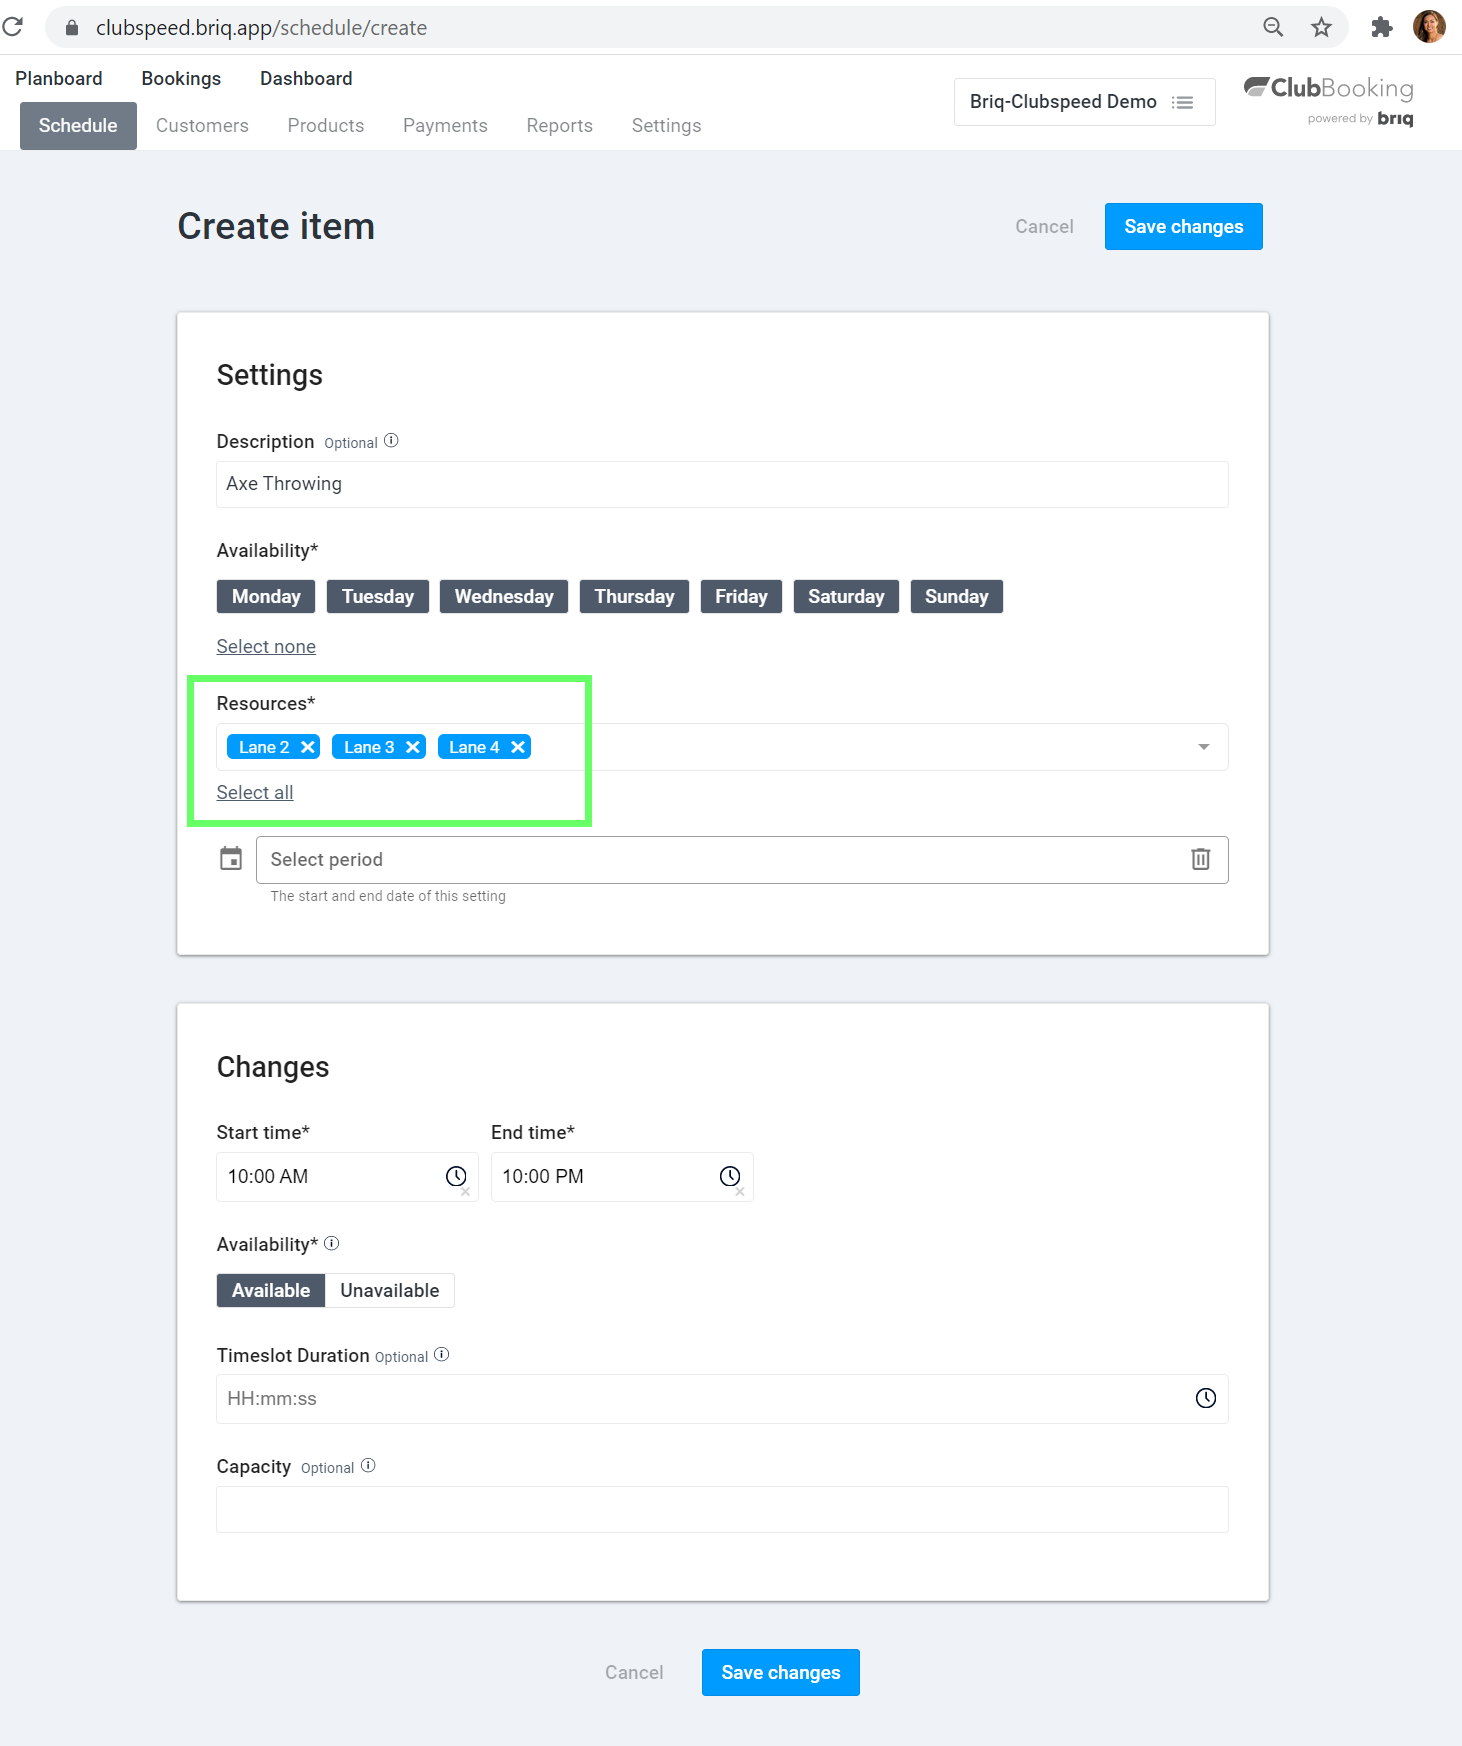
Step 5: Schedule Rules
// When you create your schedule rule, you will need to add each individual lane/room to the rule.
- They can be included in other schedule rules, or set to their own.