Sector Timing : Phase 1 – X2/X3 AMB/MyLaps Installation/Testing
- Each Sector requires its own decoder and timing loop
- Currently available for AMB MyLaps & DeHaardt
- V1: Sectors are only visible within the POS/Scoreboard & Specialized Race Results
- Can have up to 6 Sectors
- Available in Versions 21.1.2 and above
TABLE OF CONTENTS
Step 1: SQL Configuration
// Description
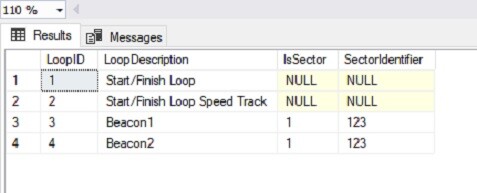
- TimingLoops
- Make sure the TimingLoops table is set up: Each beacon/loop should have it’s own entry.
Example:
- Make sure the TimingLoops table is set up: Each beacon/loop should have it’s own entry.
- TimeControls
- Make sure that the TimeControls table is set up, each beacon/loop should have it’s own entry on the table.
Examples:
DeHaardt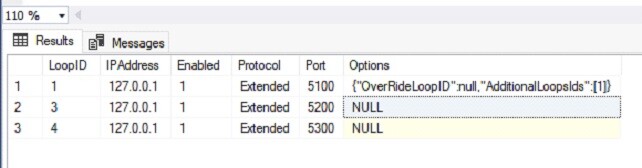
MyLaps 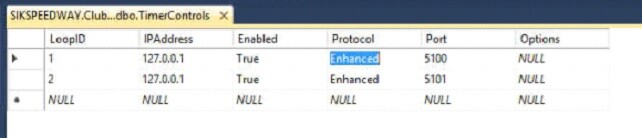
Step 2: Sectors
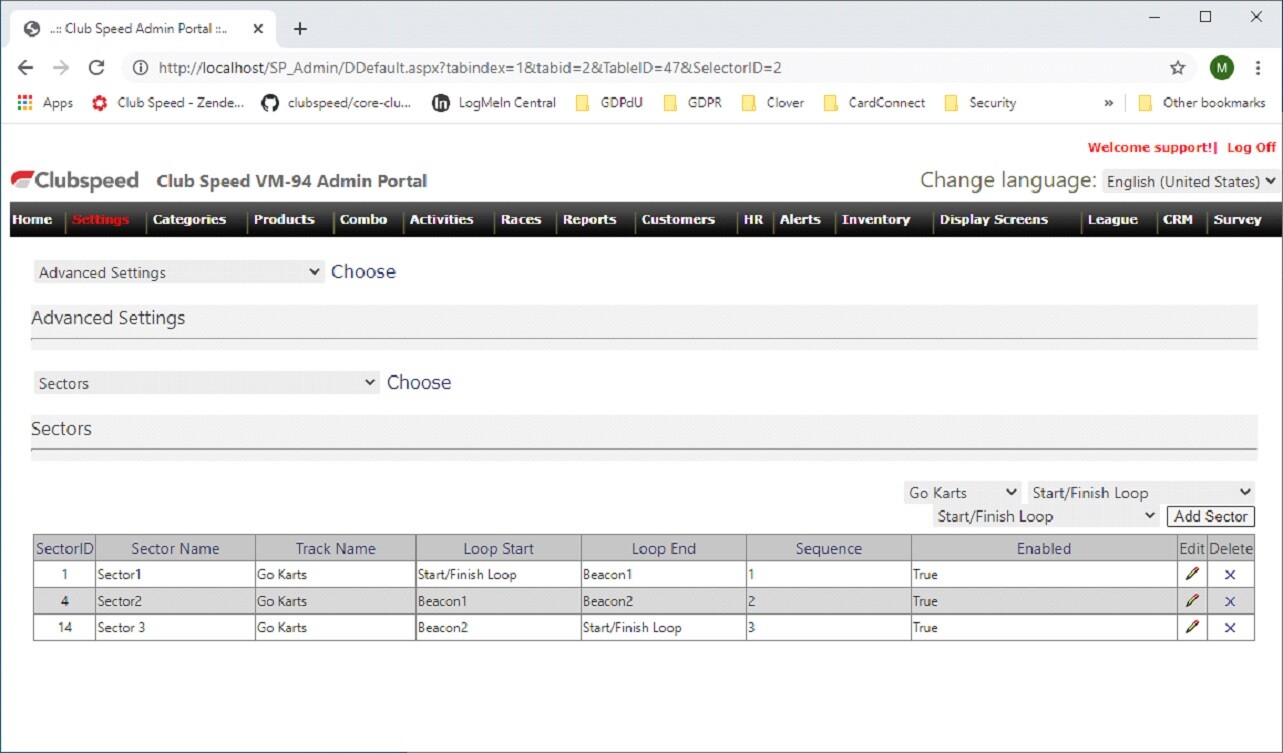
// Finally, the sectors can be set up, this can be done on SP_Admin > Settings > Advanced Settings > Sectors. Set up each timing sector for the track with it’s starting and ending loop, sequence and whether it is enabled or disabled
- Customers will have access to these settings!
Step 3: TEST
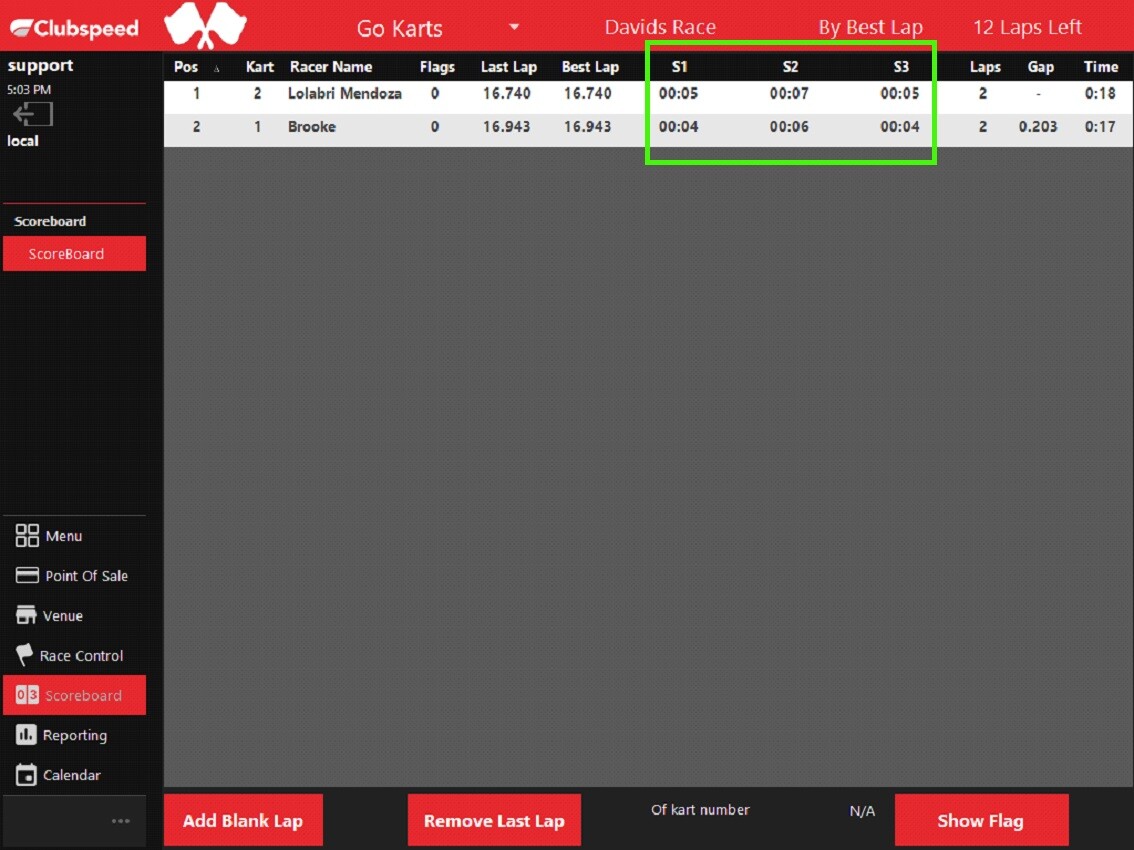
// To test the Scoreboard set up a race and start the race, random lap times are sent when a reading on the main loop timing is received. The lap times will have more variation with 3 and less sectors on a track. For the tracks with more sectors, the variation on the sector timing will be a lot less with some sector timings not registering any seconds. The purpose of the testing for now is to ensure that the Scoreboard can display a variety of Sectors on a track (up to 6 sector timings).
- Run a Race in the POS/RaceControl
Example Scoreboard with 3 Sectors
X3 Setup:
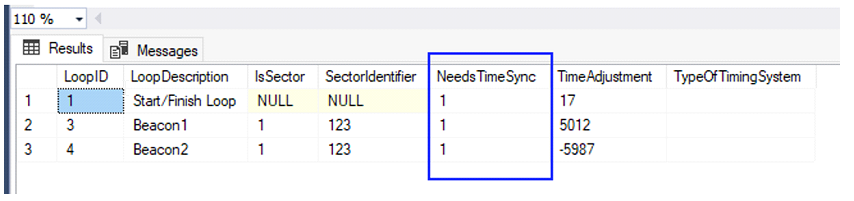
The main difference between X2 and X3 is, X3 uses Unix timestamps. This is a world clock that counts the number of seconds since Dec 31,1969. The X3 gets out of sync with this time and can be slow or fast. This will need to be adjusted within our system if its inaccurate. This can be done by enabling the NeedsTimeSync.
The setup is identical to the X2 setup with the one exception of enabling NeedTimeSynce.
Example: