Resova - Managing roles and permissions for team members
You can create and manage roles with permissions, granting or restricting access to all or selected areas of the dashboard. Before creating roles with permissions, you should first understand roles and permissions and how they work.
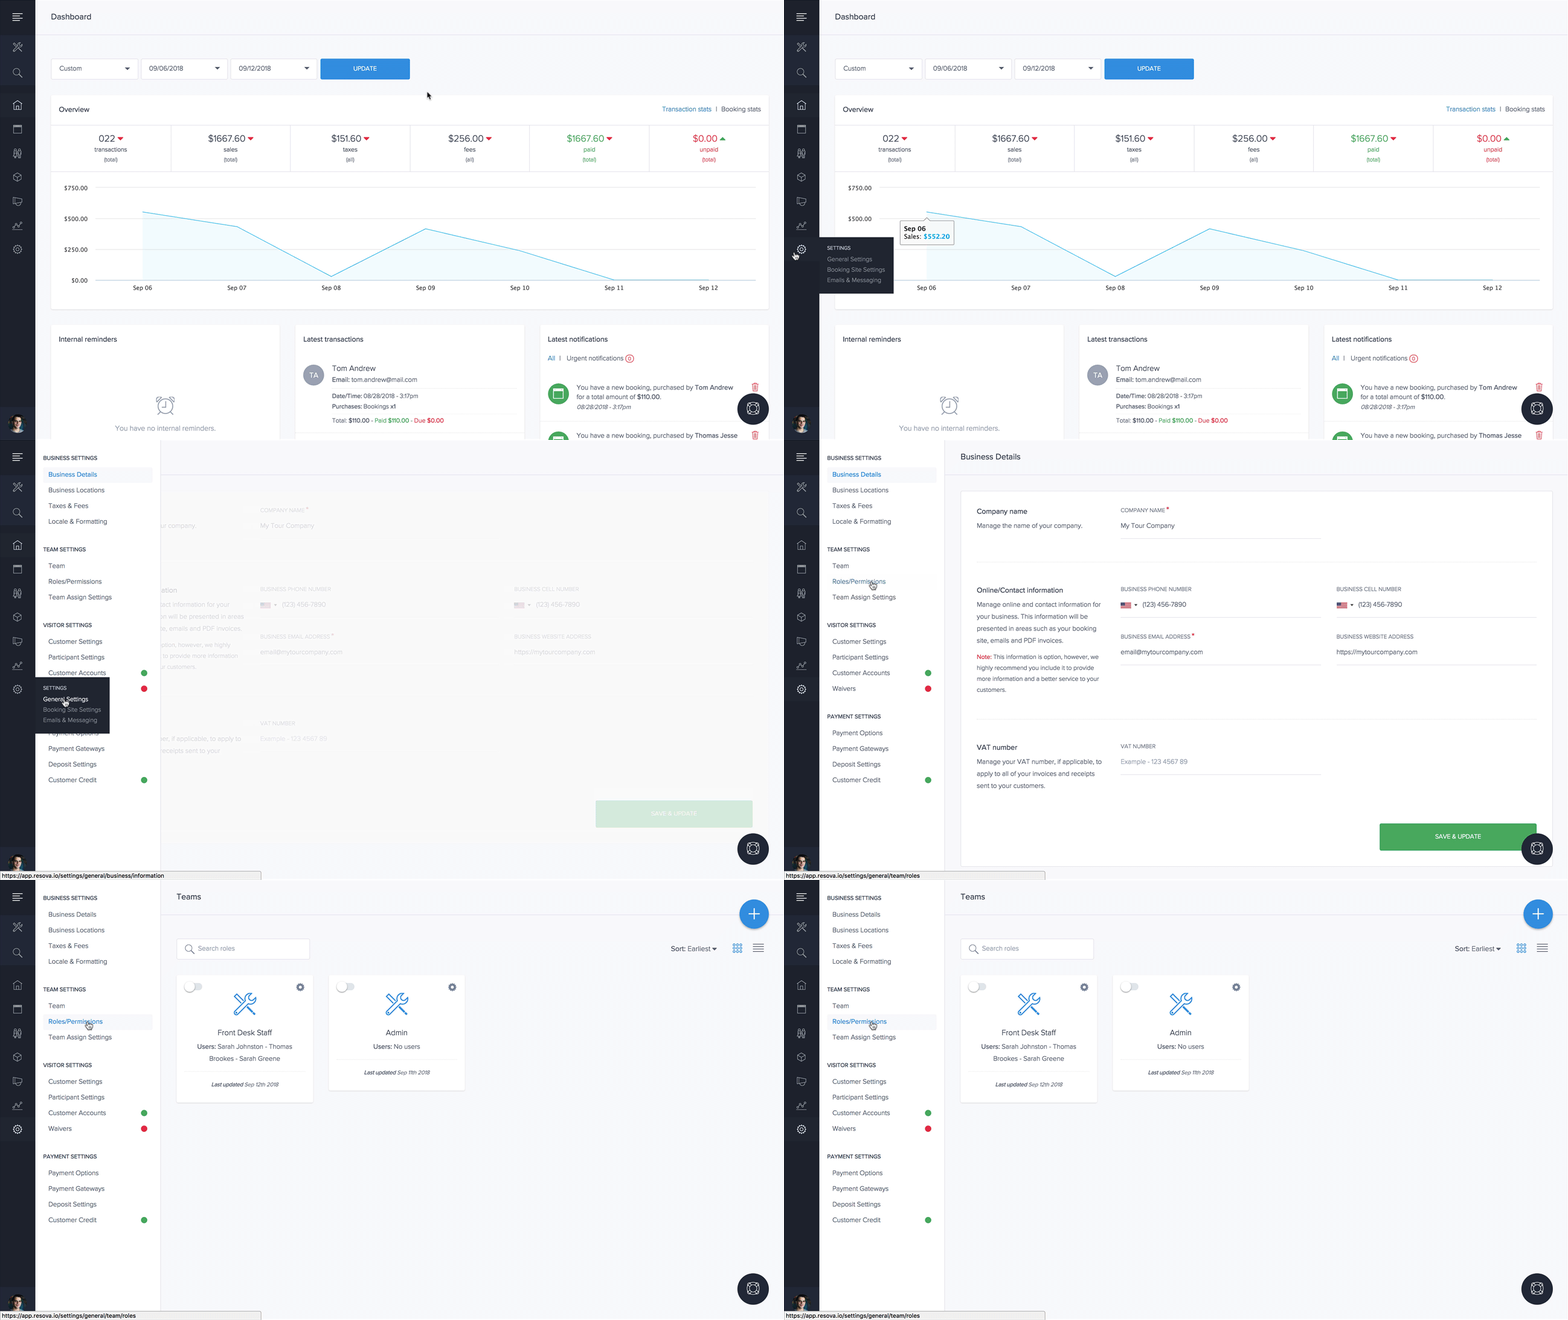
To create and manage roles, select "Settings" and then "General Settings" from the main navigation. Click "Roles/Permissions" in the settings menu on the left.

Creating a new role with permissions
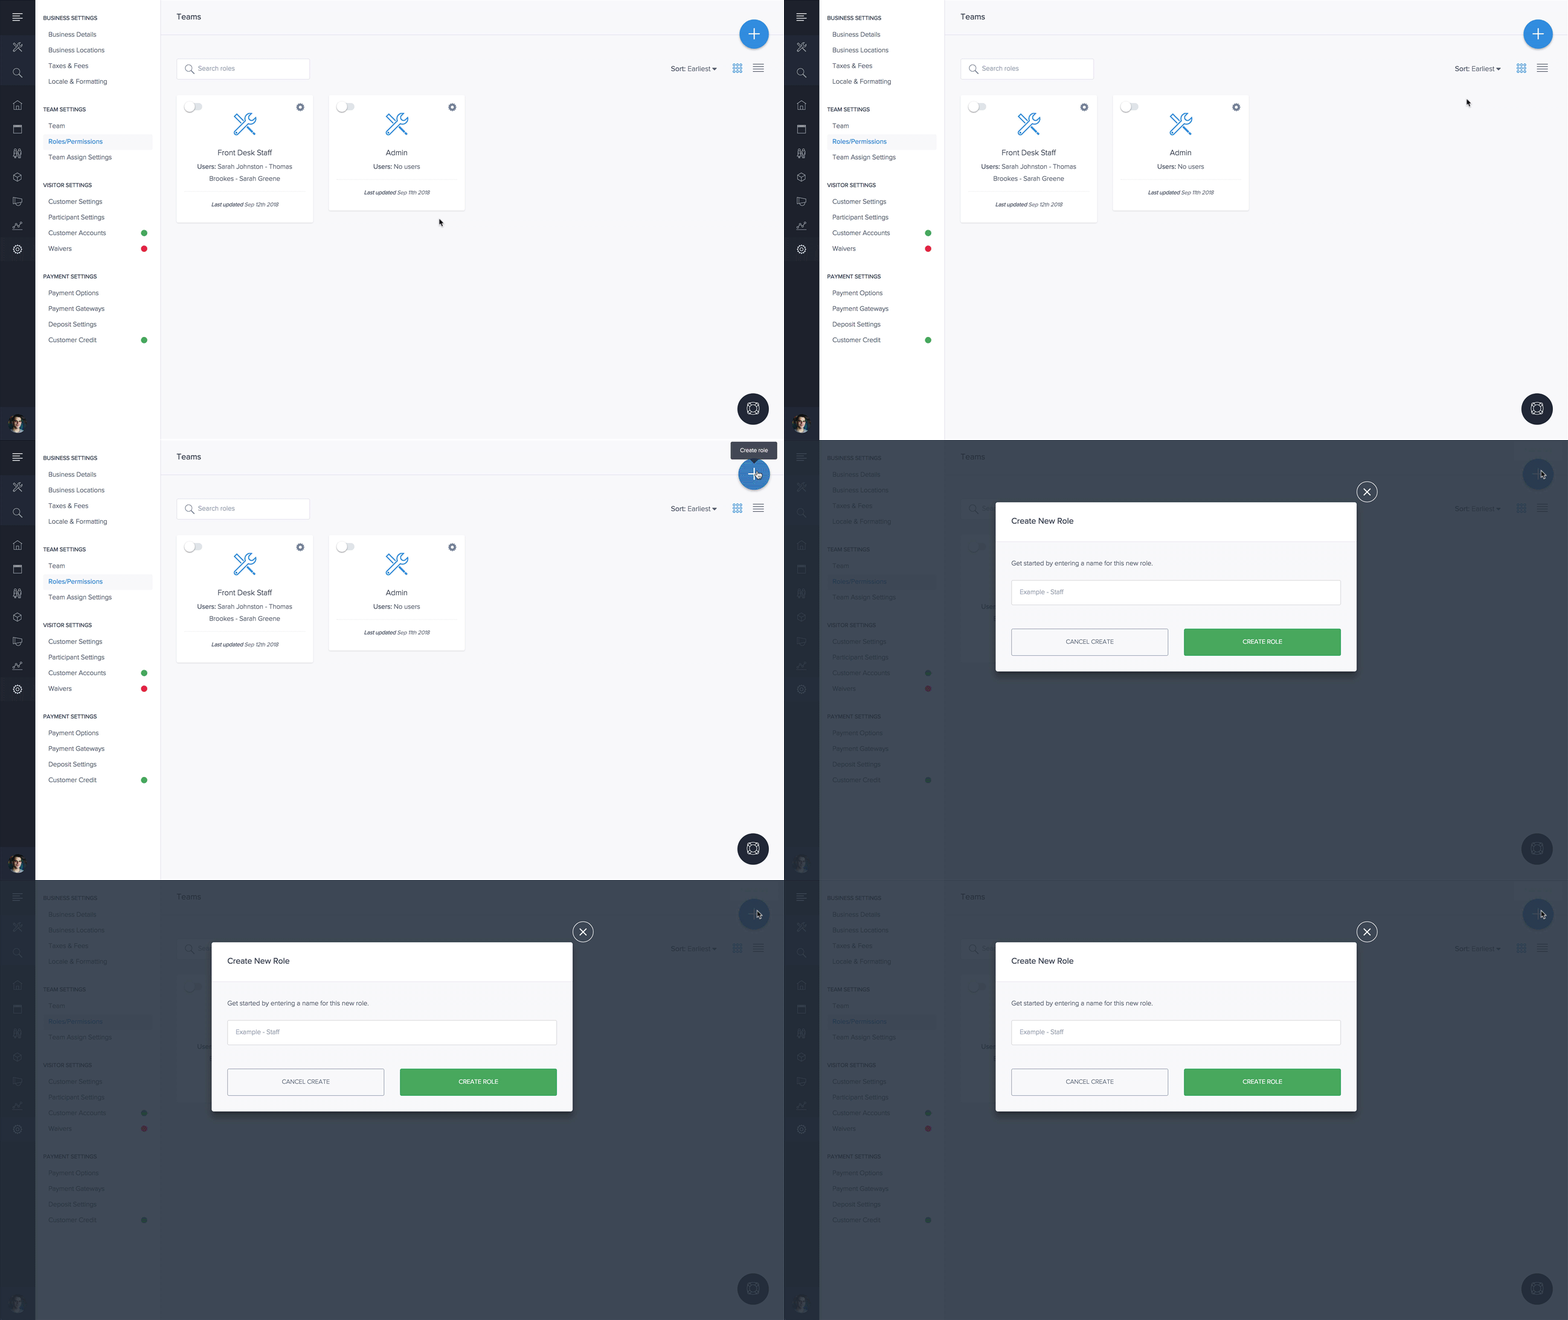
On the 'roles/permissions' page, select the blue plus icon to the right. When prompted, enter a unique role name to help identify this role from the others. Hit the "Create Role" button and your new role has now been created.

Managing and deleting existing roles
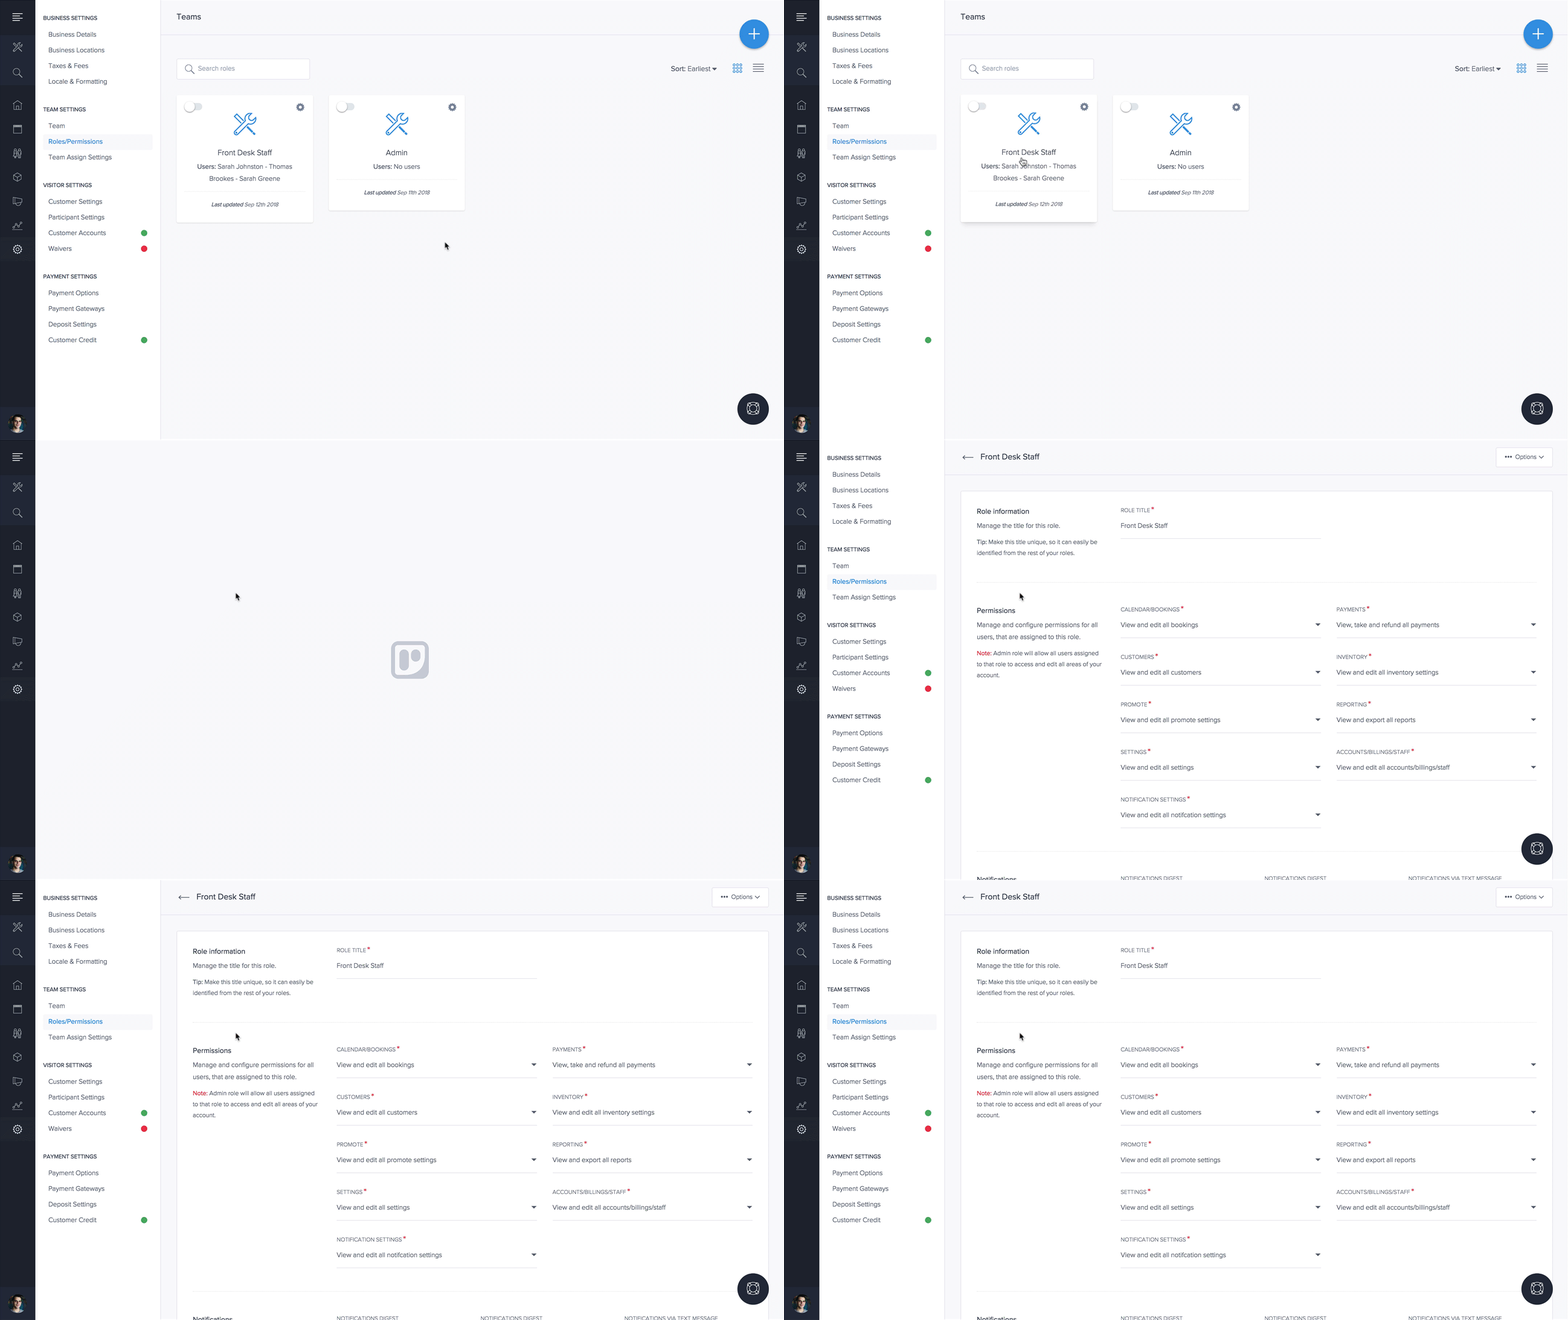
On the 'roles/permissions' page, if a role has already been created, click on the grid or list item of the role you want to manage. You can now view and edit all settings and permissions for that role.

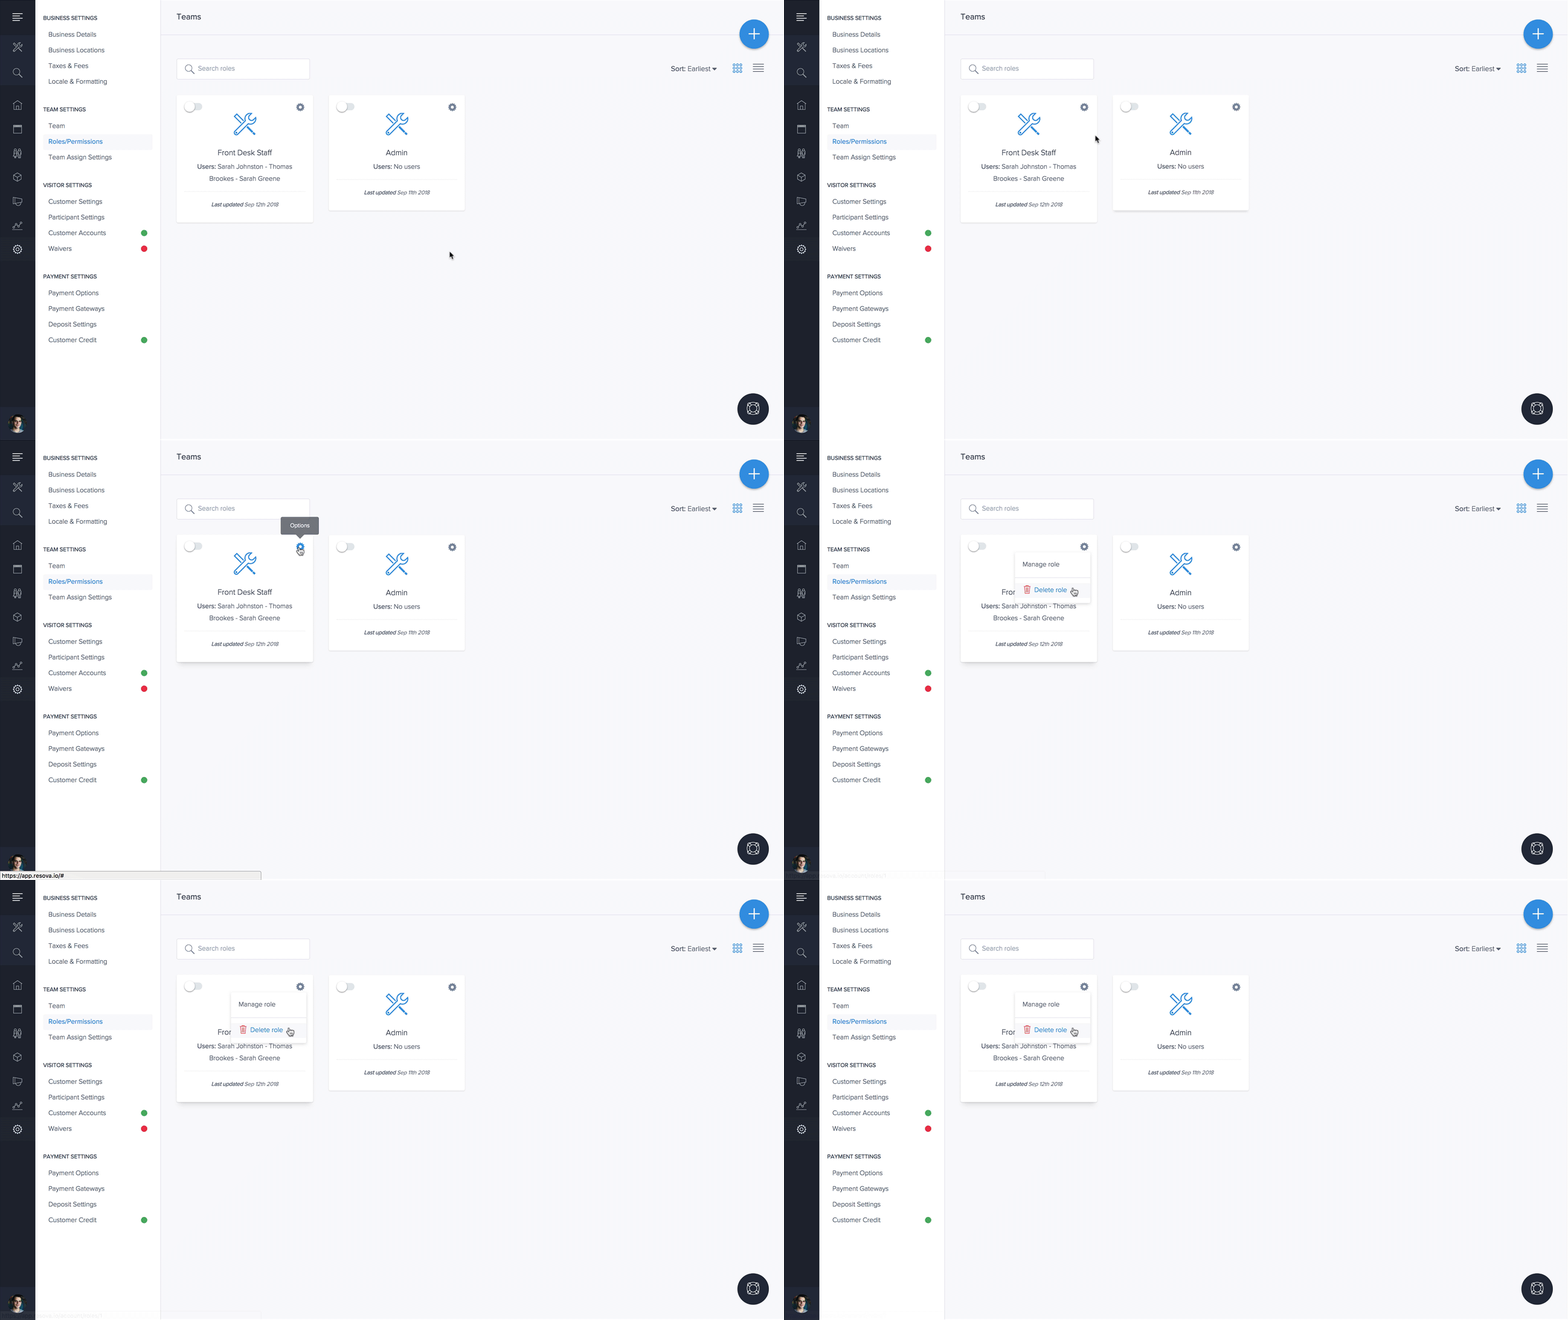
To delete a role, on the 'roles/permissions' page, select the gear icon in the grid or list item, of the role you wish to delete.

Select the "Delete Role" link from the dropdown menu, and confirm in the prompted modal. The role will now be deleted. Assigned team members to this role will automatically be assigned to the admin role.
