Wristband Printer Setup: Part 3
This section will walk you through how to adjust a Zebra printer wristband template
NOTES:
- Each venue/location will have only 1 wristband print template
- Clubspeed support personnel will modify the template to print, not the customer.
TABLE OF CONTENTS
Step 1: Template Location
// I Recommend making a copy of the template before making changes.
- Wristband template can be found in the following directory.
- C:\clubspeedapps\wristband ; The files name will be “template.js“
- C:\clubspeedapps\wristband ; The files name will be “template.js“
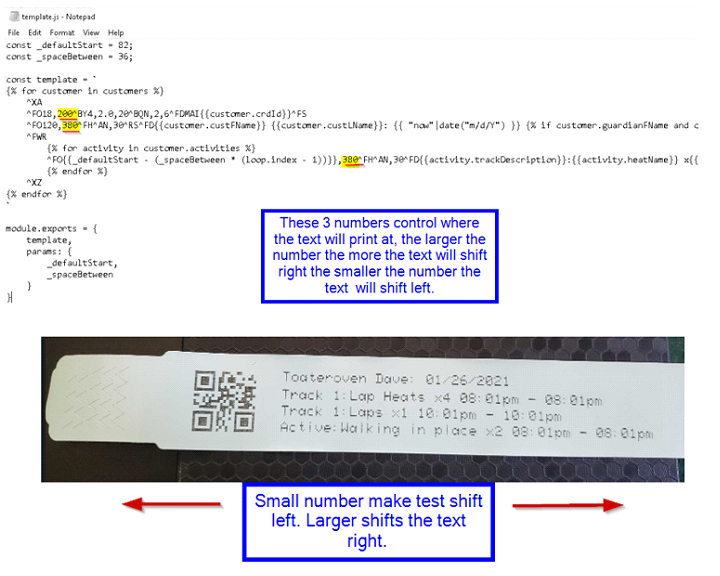
Edit the file and the following areas control the text orientation.
The template can be modified to shift the text from left to right
^FO18 will shift the QR Code
^FO120 will shift the Customer name
^FO{{_defaultStart will shift the activity names (image example 380^FH^AN)
ensure all values are equally shifted.
⦁ Once you save the file after making changes restart the wristband printer service and test printing a wristband, this does not require a main restart.
Step 2: Template Variables
// These are already included in the template, do not change them!
- Customer Name
- Time stamp (time the wristband was printed)
- Customer’s scheduled activities for the day
- Customer relationships
TROUBLESHOOTING
// Smart calibration did not work
- If the smart calibration did not work, which if you are not sure what that means, it's when it fails to adjust the width of the wristband to the general 1 inch or specified length of the provided wristband.
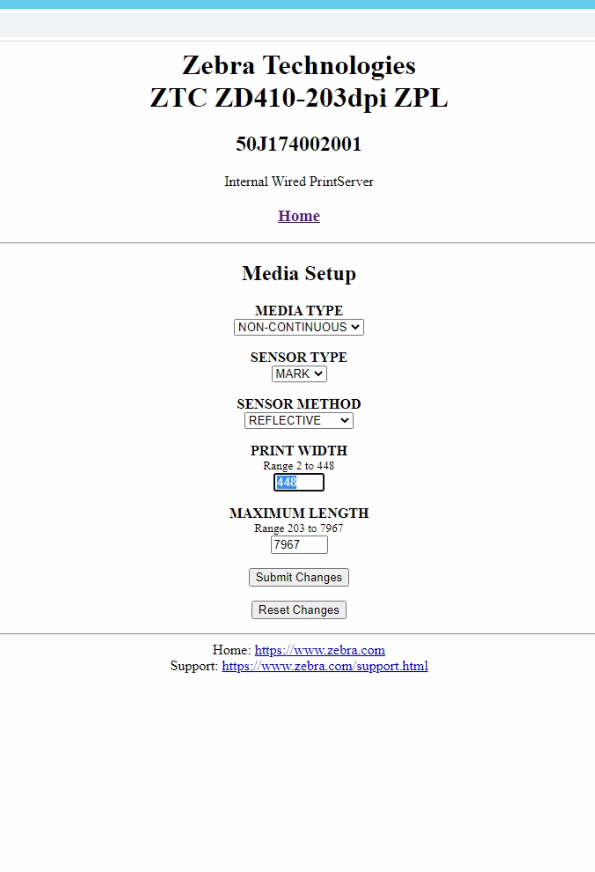
- The Print Width is located by entering the IP address into the browser, clicking the Media Setup options, and adjusting the print width section. Start at 224 and adjust accordingly.
- Example of a Print Width value set to max causing the label to not be properly aligned
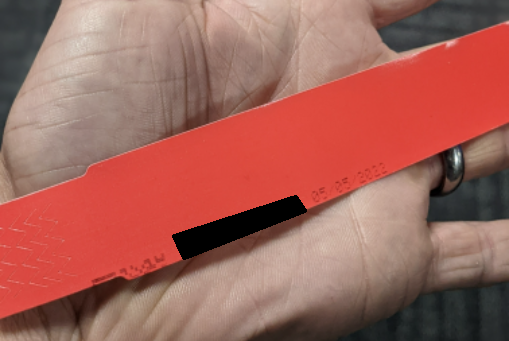
- Example of a Print Width value set to max causing the label to not be properly aligned
// Web interface for printer dose not save network configuration
- David to send more details
//Template adjuster