Topaz Signature Pad set up for Windows 11 device
This article will help you set up a Topaz Signature Pad on a Windows 11 PC.
*The Topaz needs a splitter that goes from Serial to USB or it will NOT work*
Step 1: Use LogMeIn Rescue to remote into customers PC
//This will establish a connection between your PC and the customers PC
- Open up LogMeIn Rescue on your computer
- Direct the customer to www.logmein123.com
- Select New Session and generate the pin code needed for the customer to enter
- They will have to click 'Run' and download the application so you can give it access
- Once it has completed downloading, you need to click the green play button
- MAKE SURE YOU CLICK 'RESTART APPLET AS SERVICE' (This will give you admin privilege's on their computer)
- Launch the connection and now you have access to their PC
Step 2: Make sure RD Connection session has proper settings enabled
// There are certain settings in Remote Desktop Connection that will allow it to use certain ports and keyboards to ensure external devices will work.
- Open up their Remote Desktop Connection
- Make sure it's on the desktop so they can access it
- Right-click and then click 'Edit'
- Go to the Local Resources and under Keyboard, Click the drop-down and select 'On This Keyboard'
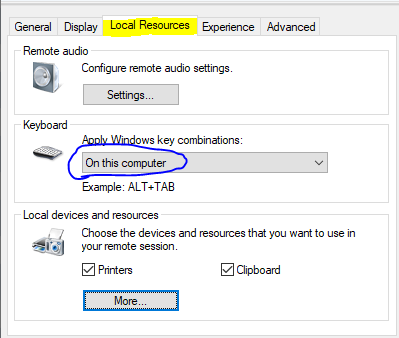
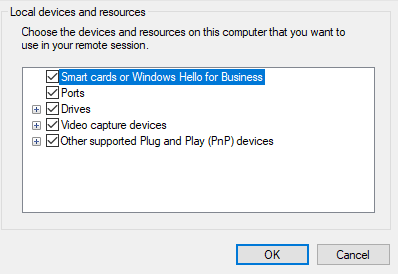
- Click 'More' and then Check all the ports
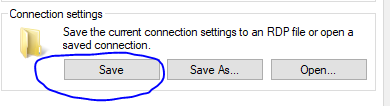
- Hit ok, go back to the General tab, and hit 'Save' (This will save the settings that you just adjusted)
Step 3: Set Baud Rate and Com Port in Device Manager
// Just like the normal Topaz setup you need to set the baud rate and com port but this time you are setting it up in the device manager
- Open Device Manager on the Customers PC
- Expand Ports
- The port will say 'Please install corresponding PL2303 driver'
- Right Click 'Please install'
- Click Properties
- Go to Port Settings
- Bits per Seconds need to be set to 115200
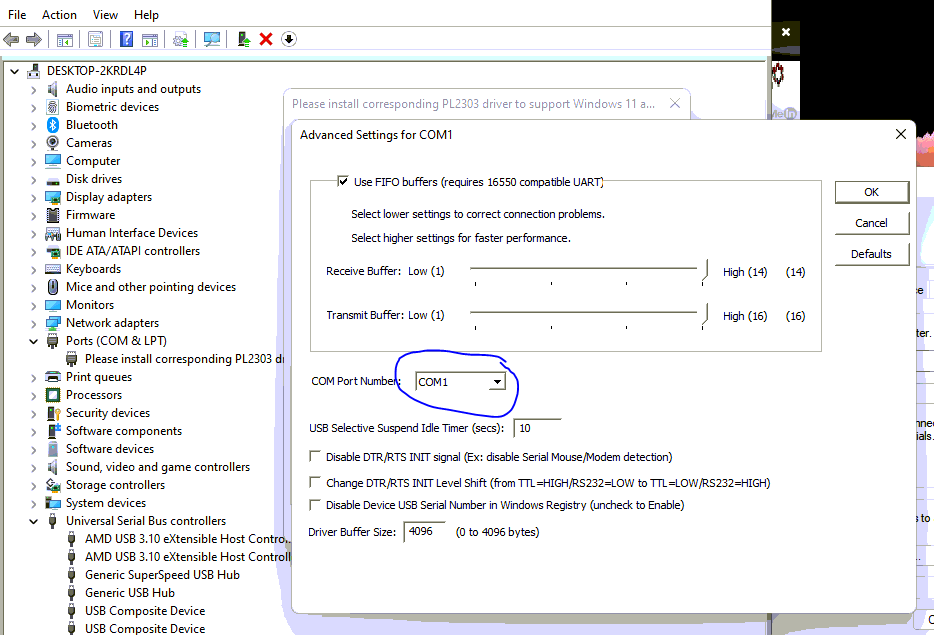
- After you had set the Baud Rate, Click 'Advanced'
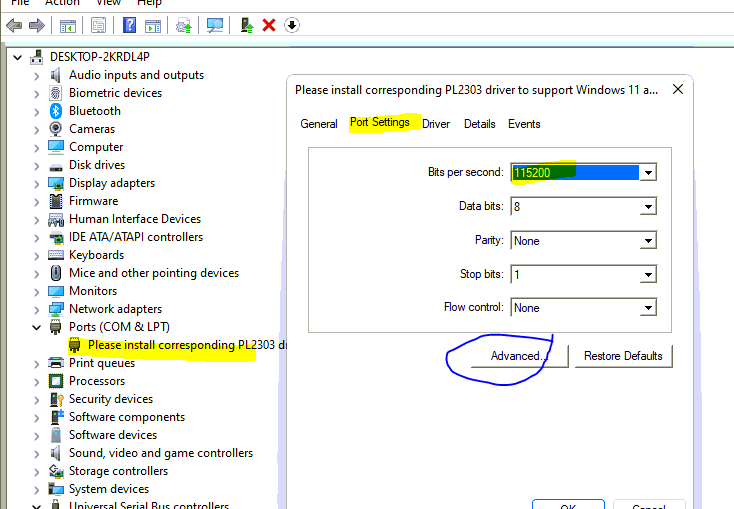
- Com Port will show you the current port it's using. You will tell it to use COM1
- Click OK, Then click 'OK' to save the settings
Step 4: Download Prolific Driver from Prolific onto the customers PC
// Now we need to grab the updated driver from Prolific website and download it onto customer PC
- Click link:http://www.prolific.com.tw/US/ShowProduct.aspx?p_id=225&pcid=41
- Click the most recent released driver

- The link will begin to download a zipped folder
- Extract files in the download folder
Step 5: Update Prolific Driver in Device Manager
// This will finalize the Topaz set up and the Windows 11 PC will recognize it as Prolific Serial to USB
- In Device Manager, expand Ports and Right Click 'Please Install Corresponding Driver'
- Click 'Update Driver'
- Click 'Browse on my computer'
- Click 'Let me pick from list'
- Select the most updated version of the driver (3.9)
- You should see the driver is now called 'Prolific USB-to-Serial'
//Driver installations FIX
*IF the PC won't recognize the drivers in step 5, you have to install the driver using the install wizard*
-Go to the extracted driver install folder
-Select the Logo_Driver Setup application
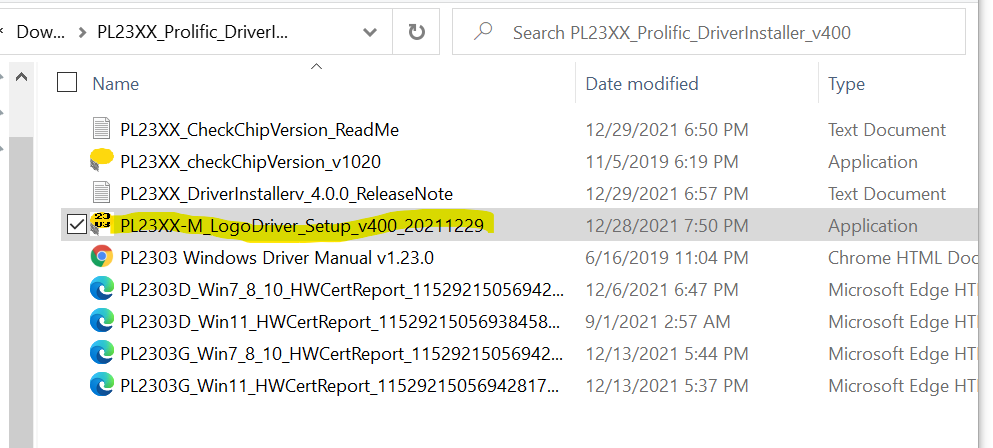
-Then follow the prompts to complete the installation of the drivers
-Then repeat step 5 to select the correct driver
Step 6: Test and Resolve!
// Make sure to test the signature pad by loading up the session in RDC. If there is already a session open then click Menu > Exit to close the session and start over
- Open up the POS
- Go to the Venue tab and grab a test profile
- Have the customer sign the waiver on the Topaz Signature Pad
- Waiver SIGNED!
- Repeat process for any other Topaz Sig Pads
- RESOLVE THE TICKET!
Step 7: Jump for Joy!
- Get out of your chair
- Jump in the air with a smile on your face