Setting up a Point of Sale Printer (Epson)
Setting up a Point of Sale Printer (Epson)
Locating the printer
First we need to locate the printer on the network. For this, we will use the newest version of Epson Net Config. Current version to date (8/17/2022) is version 4.9.5 Epson Net Config . Once we have that installed, go through and install this with all the defaults settings.
From here, it will load up like the image below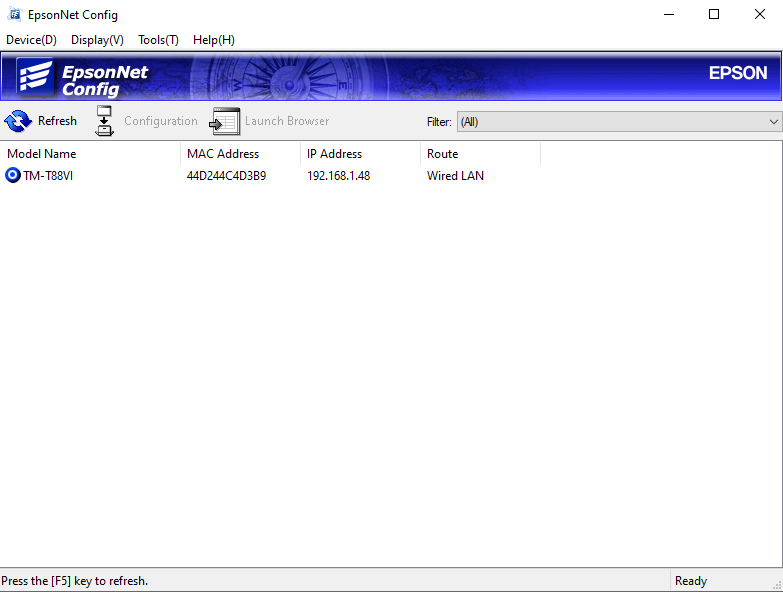
This WILL find any printer on the network, regardless of it being on the correct IP scheme. If the printer does not show up here, have the site factory reset it.
Factory Reset Epson Printer (If Needed)
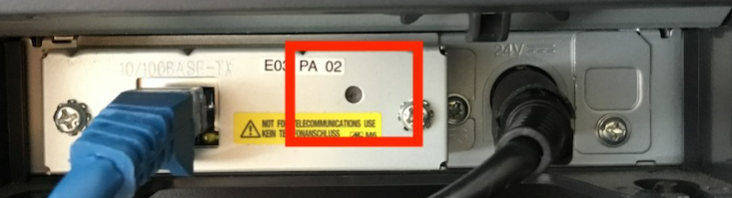
To factory reset an Epson Printer, there should be a pin hole in the back of the printer. Have the site locate this pin hole first. When they locate that pin hole, they will turn the printer off, press that pin hole in the back, and turn it back on while holding that pin hole.
Once it is factory reset, it will either set itself to DHCP and find its own IP address on the network or be set to 192.168.192.168 depending on which model version it is. (TM-T88V will go to 192.168.192.168 while TM-T88VI will generally go to DHCP and have a new IP address)
Setting the IP of the printer
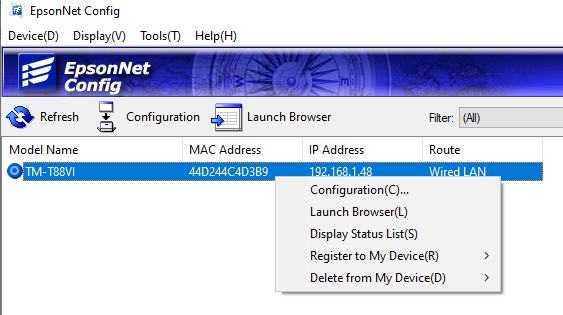
From here we will be setting the IP of the Epson printer. Highlight the printer and right click on it and select Configuration(C).
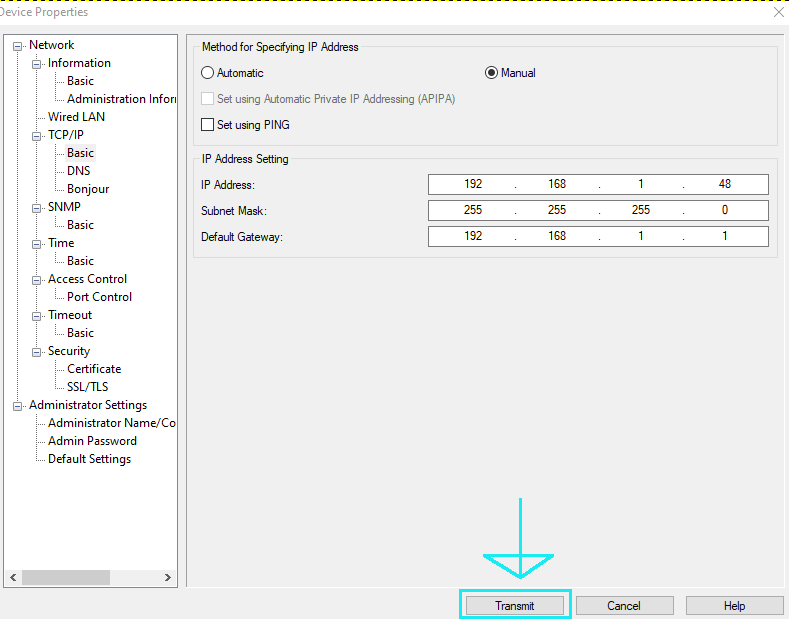
We will be setting up the printer’s IP address from this new page that appears.Select “Basic” under “TCP/IP”
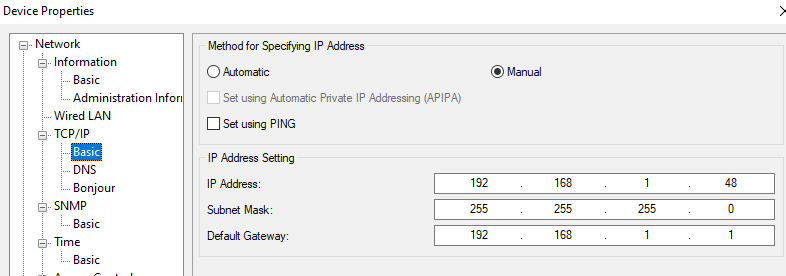
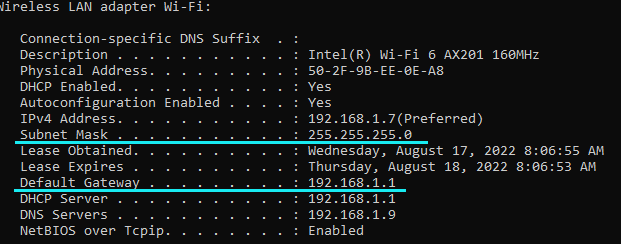
We will need to set the IP, Subnet Mask, and Default Gateway. For Subnet Mask and Default Gateway, open a command prompt on the server and type in IPCONFIG/ALL and use the settings for those that come up.
After we set that up on an free IP address or to what the location wants this IP address to be set to, hit Transmit at the bottom.
This will cause the printer to restart. From here we will want to run a continuous ping from command prompt using Ping 192.168.1.48 -t and keep in mind, 192.168.1.48 will be replaced with the IP you just set the printer to.
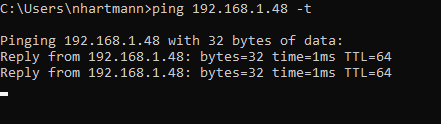
Once we see the Reply from we see above, this will let us know the printer has finished restarting and is now set to the new IP address.
Setting up on OPOS
From here we will set up the printer in OPOS on the server. Open up OPOS by hitting the windows key and typing in OPOS
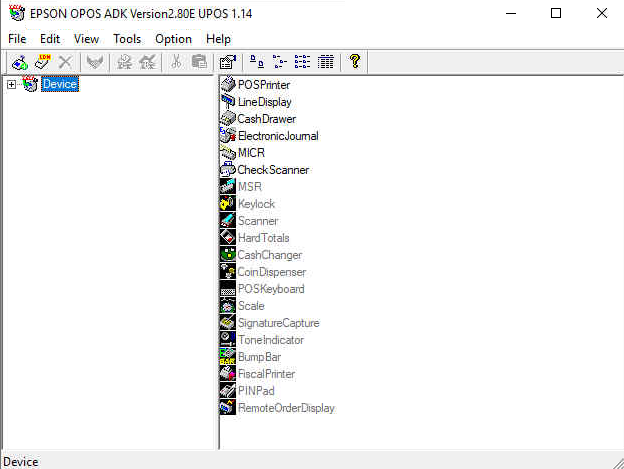
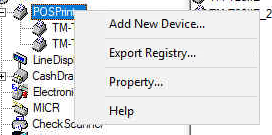
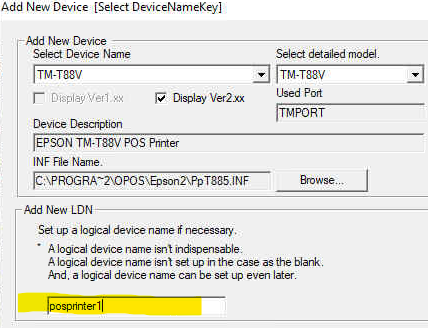
From here we will expand Device and highlight POSPrinter. Right click it and add “Add New Device”
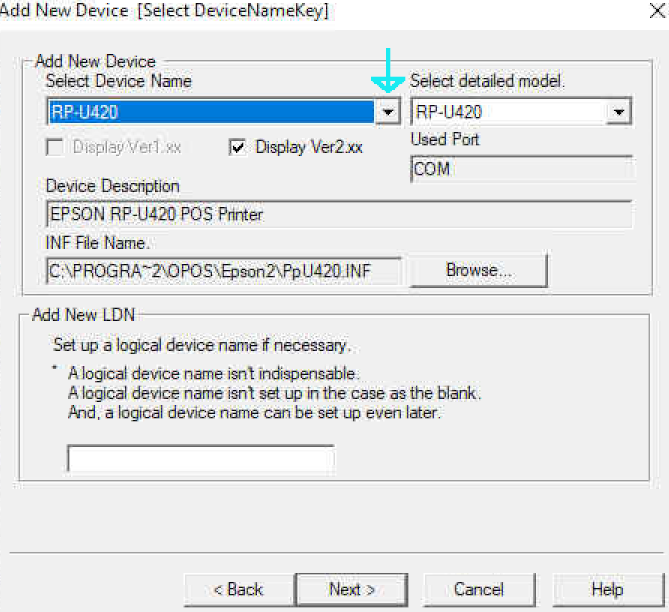
From the drop down menu for “Select Device Name” we will find the name of the printer we are looking for. The most common ones are TM-T88V and TM-T88VI but others may be used here as well.
From here we will set the “Add New LDN”. This will be the name of the POS printer from SQL. To find this, open up SQL, expand the nodes to the left in order of Database > ClubspeedV8 > Tables and right click on dbo.ControlPanel and select “Edit Top 2000 Rows”
When the new table loads, hit Ctrl+2 on your keyboard to bring up a search function. Next to “TerminalName” and under “Filter” enter in the POS terminal you are looking for. For this example, we will use POS1. Hit Ctrl+R when you are done to search for this in terminal names.

This will bring up all the control panel settings available for POS1. Look for the terminal settings of “ReceiptPrinterName” and “RaceTicketPrinterName” which should be matching. For this POS1 terminal, we can see it is posprinter1. This is usually the default that the majority of our sites will be set to. It is generally best practice to make sure of this but this will be the most common text it will be set to.

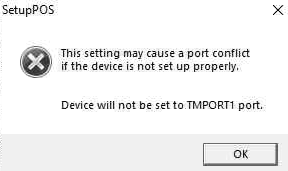
If you get an error message that says what is in the image below, that is perfectly normal and just hit “OK” and continue with setting up the printer. We will change this TMPORT in the next step.
From here we will be entering in that text into the “Add New LDN” of OPOS
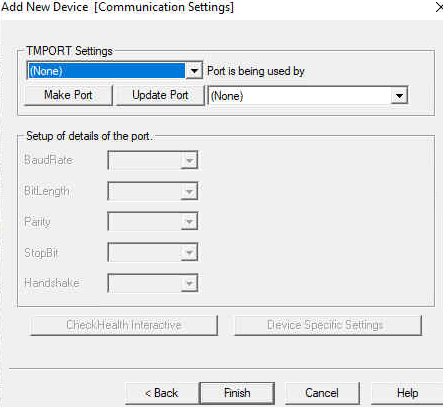
From here you will either need to create a new TMPORT or use an already existing one if it does not exist. You will selecting the drop down under TMPORT and search for the IP you set the printer to previously. If this does not exist, select “Make Port”
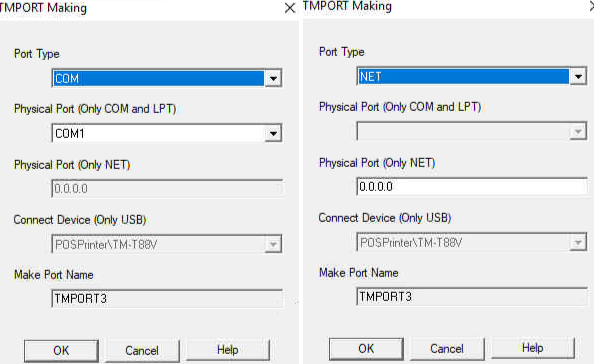
If you look at the image below, the Port Type is set to “COM”. Please select “NET” from the drop down.This will open up the “Physical Port (Only NET)” area where you can now enter in the IP address of the printer. Type this in and select “OK” to set up the IP on that TMPORT.
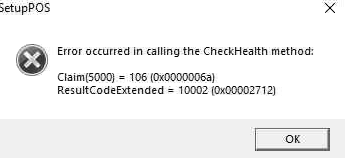
From here, the “CheckHealth Interactive” will unfade and be able to be used. This MAY NOT work everytime but this does not mean the printer does not work with Clubspeed.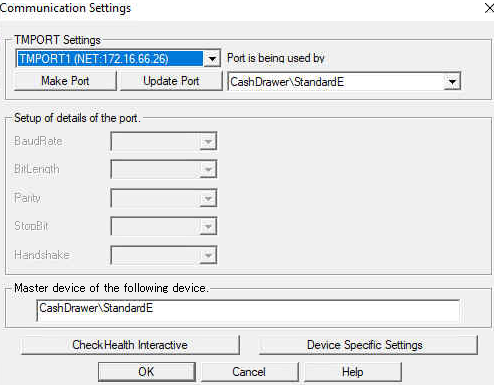
If you select that button and get the error you see below, reload the POS terminal and test on the point of sale regardless.
From here, the printer is set up correctly with the point of sale and should be fully functional. If an issue persists or it is not connecting to the point of sale, check to make sure the correct POS is being used and continue troubleshooting.