Schedule Online Availability (Part 3)
ABOUT: Scheduling Online Availability
In order for your customers to see what activities and times they are able to reserve, you will need to pre-schedule all heats/activities on the Venue via the POS. Once they are on the Venue, then you will mark them as 'available' from the /admin dashboard.
>> This step will be repeated on a weekly or monthly basis, depending on how far out you choose to schedule your availability!
Step 1 - Venue Schedule
// You will want to prepare a game plan of the days and times of the week you want to make available!
1. Log into your POS or OFF(ice) terminal and navigate to the Venue module
2. If you have more than one Track/Activity available, make sure you are viewing the one you would like to schedule on.
3. Add heats/activities to the venue schedule just like you do on a normal day-to-day basis.
Step 2 - Manage Bookings
// This is where you will be pairing the Reservation Item to a heat/activity. This way, the system knows which product to add to the cart!
1. Navigate over to your /ADMIN > Online Booking > Manage Bookings
From the top drop downs:
2. Select the Date
3. Select the Track (if more than one available)
4. Select Activity Type (If more than one available)
You should now only see the Heat/Activity you have filtered out. Go ahead and click on the Select All button, or manually check the boxes of the times you'd like to make available.
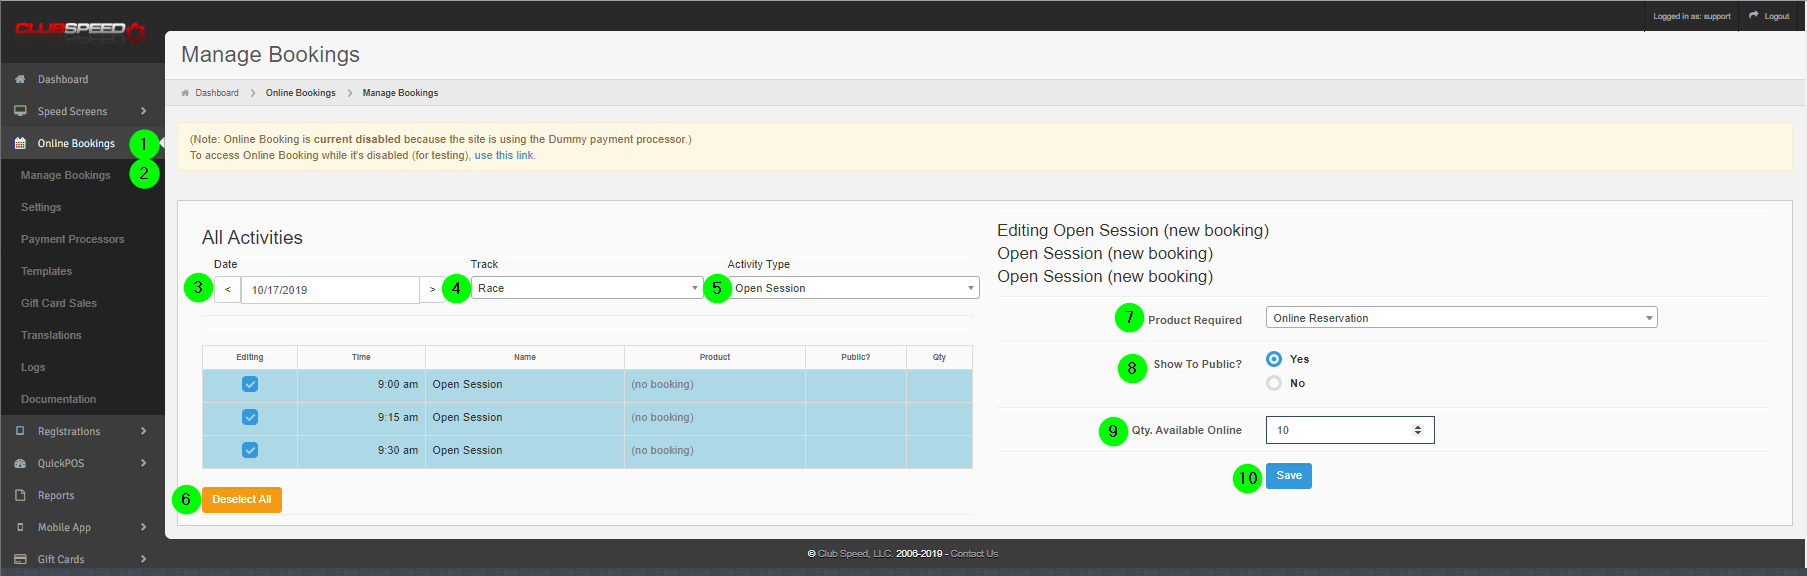
5. On the right, select the Reservation product you wish to link to this heat/activity
6. Check YES to show to the public.
7. Enter Quantity to make available online.
- What is the MAX availability for this h/a?
- Do you want to make 100% of the spots available online, or just a portion of them?
8. SAVE!
9. Confirm you want to make these changes on the pop-up.
Your bookings should now show the reservation product and availability, like below:
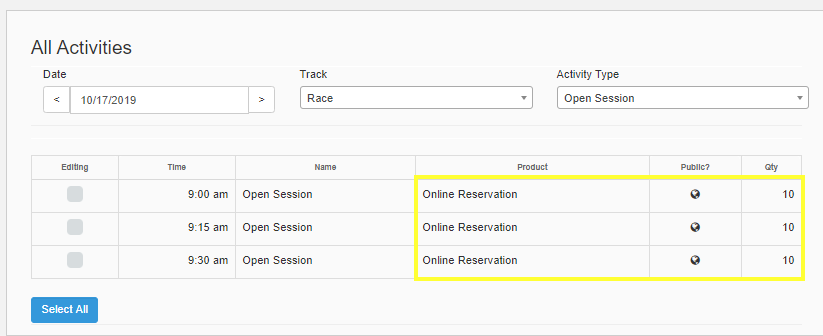
// Continue this process for all Dates, Tracks , and Heat/Activities!
Step 3 - Review & Test
Part 1
// Now that you have made your heats/activities available for online reservations, you will want to review the process yourself by processing a test purchase. Make sure to contact Support to set your payment processor to TEST MODE while you complete these, and then contact them to set it back to LIVE!
>>> Use these Test Credit Cards!
Direct Reservation link:
https://<your_track_url>.clubspeedtiming.com/booking
The purpose of testing the Online Sales first is to confirm your Online Booking settings are satisfactory, emails templates arrive and display the info/images appropriately, and that you yourself understand the process it takes for your customers to complete a transaction.
Part 2
// Last but not least, now that you are familiar with the Sales process and all of your editing is complete, we want to test a LIVE transaction! This is for two reasons; First, to make sure the setup is correct on the back end (aka your transactions are successful) and second, you want to make sure the funds hit your bank account & how long this is expected to take.
No one wants ANY surprises when it comes to their money!