How to Use Product Inventory
ABOUT: POINT OF SALE INVENTORY
Step 1: Build Inventory Items
// The Point of Sale Inventory is a full fledged inventory system to manage and track your tangible items. There are two places to setup and begin using your inventory system.
Create Inventory Products
1. When you first create a Product in the Products tab, there are 3 Inventory options available to set your cost, whether to inventory the item or not, and to set you maximum item inventory levels.
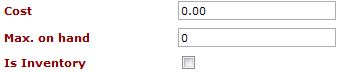
Is Inventory
Before you can start tracking your inventory items, you need to let Clubspeed know which items or products you want to track by checking off the "Is Inventory" check box. This will put the item in the inventory list and track its levels. Obviously for intangible items like a 10 minute race or laser tag session you wouldn't be keeping track of inventory so you can leave this unchecked. But for something like a Snickers Bar or T-Shirt you would check this box.
Cost
The Cost is your material cost for purchasing the item. This is what will help Clubspeed calculate how much you have tied up in inventory costs.
Max on Hand
This is the amount that you want to optimally have. If you currently have 20 hats in stock, and the max on hand is set to 100, Clubspeed will tell you that you need to order 80 hats to get back to your optimal level.
2. The Inventory Tab where you can view, edit, manage and report on your inventory levels.
POS Inventory Maintenance:
This is where you will manage what it is that you would like to track inventory-wise. If you would like to track the inventory of the first item on this list, the $1 Gift Card, then you would check the box as shown below that says “Inventory?”. The items like “30 mins Arrive and Drive” you can uncheck as that is an intangible resource that doesn’t have a finite amount to track.
- The Cost field is how much the item costs you to replenish it, it is not the retail price at which you sell it.
- Maximum on Hand is the amount that you want to have when you order items. For example, if you currently have 6 $1 Gift Cards in stock and your Maximum on Hand is 40, then when you make a PO for this item it will tell you that you need to order 34 of these and generate the proper PO based on that number.
- The vendor drop down box is where you will choose which Vendor you purchase this inventory item from. Vendors are setup in the previously mentioned drop down box under “Vendors Table maintenance”.
Vendors Table Maintenance
// OPTIONAL

This section is where you will enter your vendors and their contact information. The entries here will show up in the other sections of the Inventory system where you can select a vendor to either send a PO or setup an item and attach that vendor to it. If you enter the Vendor’s email address you can email the vendor your Purchase Order.
NOTE: The vendor table maintenance is shared between the garage and POS, so don’t be alarmed if you see a bunch of kart suppliers there
Step 2: Enter Inventory Count
Physical Count Data
//Adjust Inventory Manually
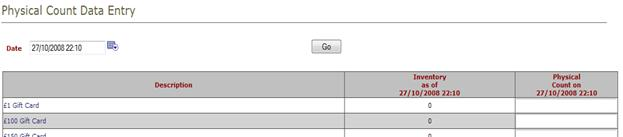
The Physical Count Data Entry section is where you will do your periodic inventory controls/adjustments. This is where you would physically count the inventory and correct it here if you were +/- on any inventory items. This is will change the available amount after you save.
Purchase Order Data Entry
// Create a PO to add inventory into your system
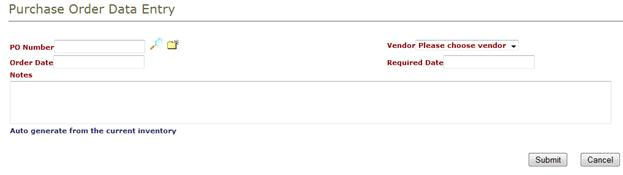
The above picture shows the interface for creating and managing PO’s.
- The PO Number field allows you to either enter a prior PO number you already know and hit the magnifying glass to search for it, or hit the asterisked folder to create a new PO number.
- The order date is the date that you made the order.
- The notes section allows you to enter notes about the order that you can later view and your vendor will also be able to view.
- Vendor Drop down: Allows you to choose your vendor that you have previously setup.
- Required Date allows you to enter a date that you must receive the merchandise by. This is just a notice to your vendor, it doesn’t have any other functionality other than keeping track of when you need it by.
- The auto generate from current inventory will create a PO for all the items you currently have in stock that are below their maximum order amounts. This is the quickest was to create PO’s.
Receipt Data Entry
// Receive the PO into the system
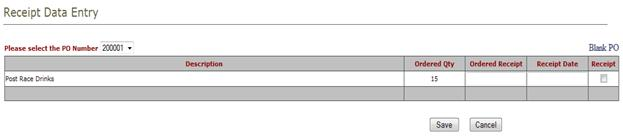
The receipt data entry section allows you to manage your PO’s as they come in from your vendors. It will list all your outstanding PO’s and allow you to check them off as you receive them. By clicking on the receipt check box you are verifying that the items have come in and the amount you ordered will be added to the available inventory amount automatically.
Step 3: Reporting
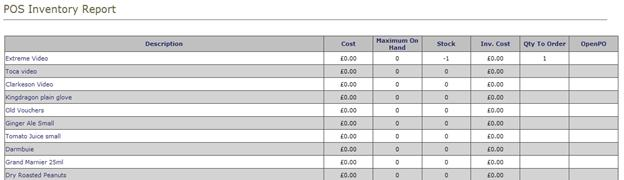
POS Inventory Report
The POS Inventory report is where you can take a snap shot of your current inventory. This will give you the description of the item, your cost for purchasing, the maximum on hand that you currently have setup, your current stock that you have on hand, total inventory item cost, how much you need to order to fulfill your maximum on hand and any PO’s that are currently open for that item. This last one will prevent you from double ordering items and give you the ability to check on orders.