How to Setup Auto Bill
How to Setup Auto Bill
ABOUT: Auto-bill Setup
Automating your monthly, or yearly memberships is a great way to keep income flowing without having too much manual labor on your end. Not only will your customers be happy to have credits on their account already, but the company as a whole will save time and money while improving customer relationships.
Please inform SUPPORT if you plan to use this feature so they can confirm the feature is turned on for you before testing!
TABLE OF CONTENTS
- Step 1 - Consent Form
- Step 2 - Card on File
- Step 3 - Create Auto Bill
- Step 4 - Sign Consent Form
- Step 5 - Run Auto Bill
- Reporting
Step 1 - Consent Form
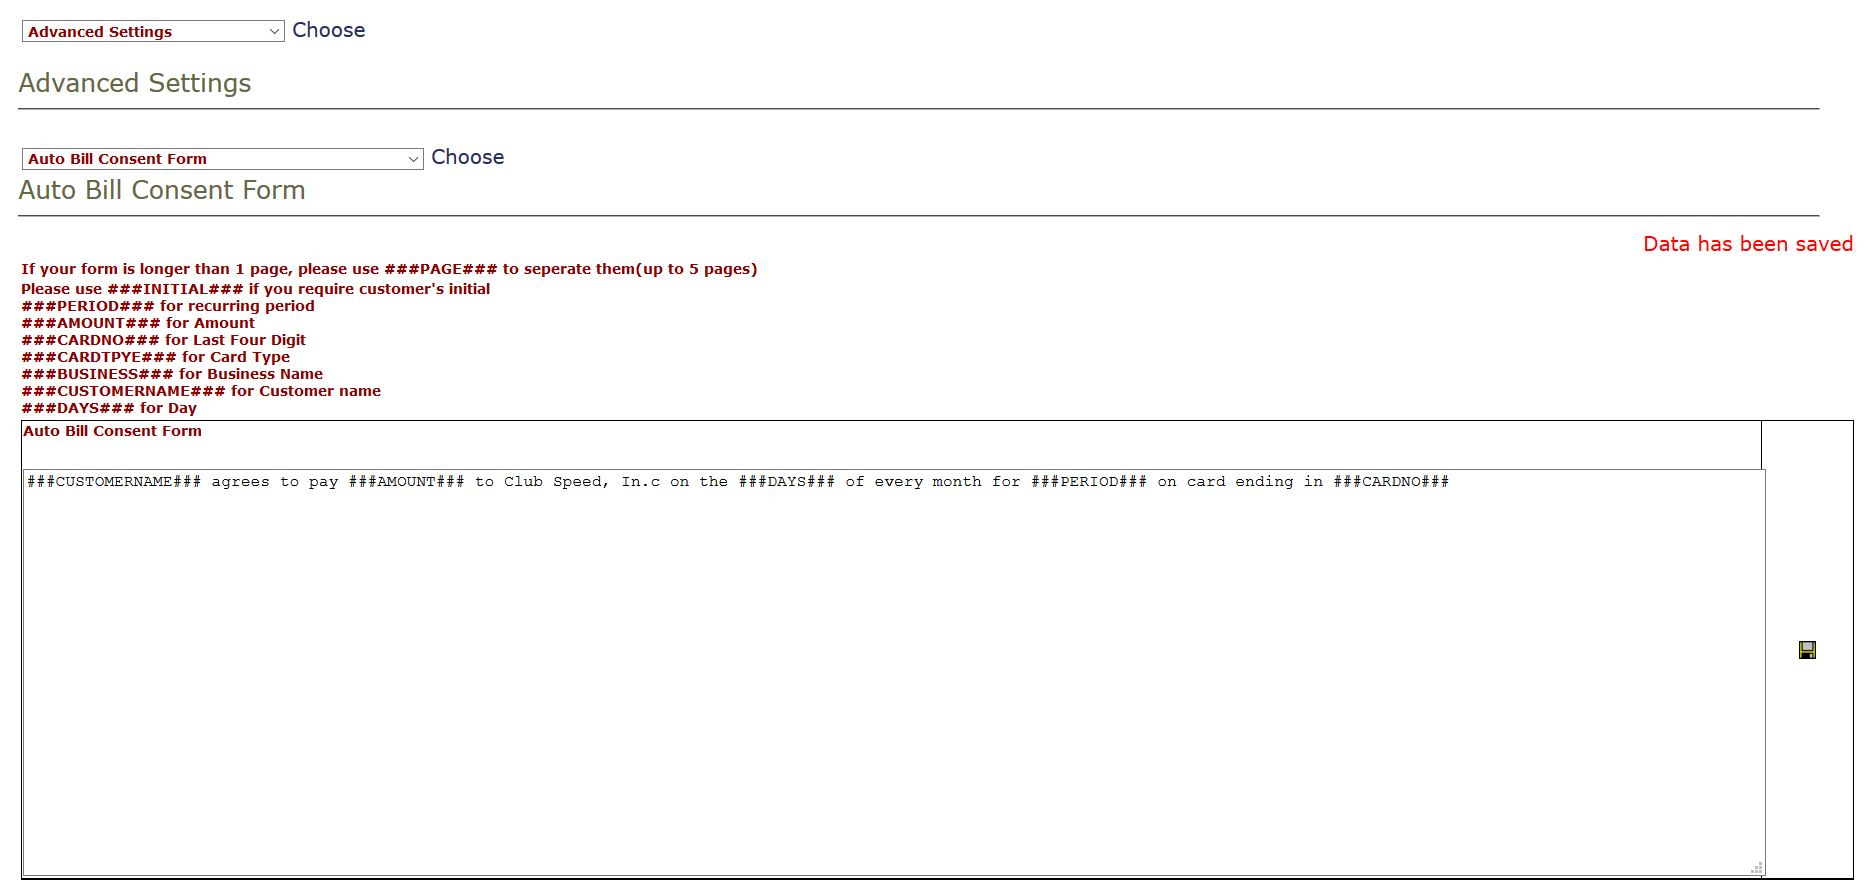
- Navigate to your /sp_admin portal > Settings > Advanced Settings > Autobill Consent Form.
- Add your Terms and Conditions here using the allotted variables.
Step 2 - Card on File
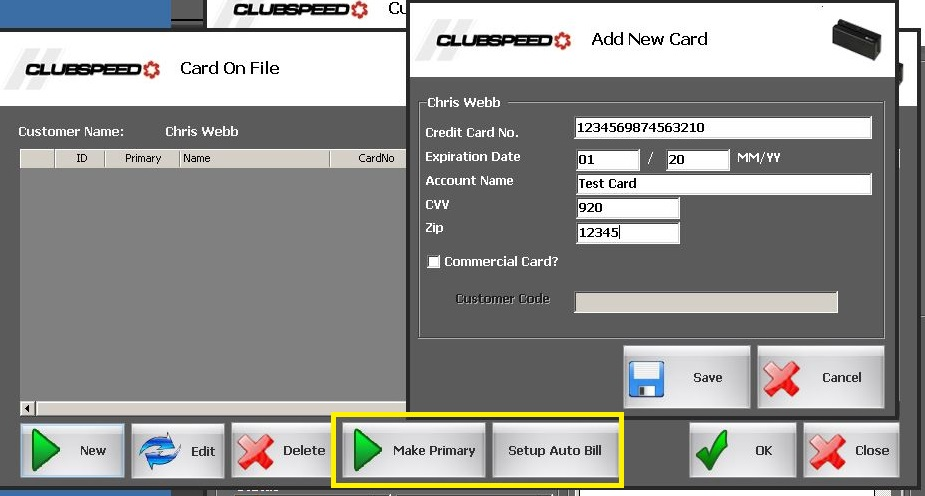
- Open your POS or OFF terminal and navigate to your customer’s profile and select ‘Credit Card On File’ from the right column. Then click on the NEW button to add in their CC information. You have the option to manually enter in the number, or swipe.
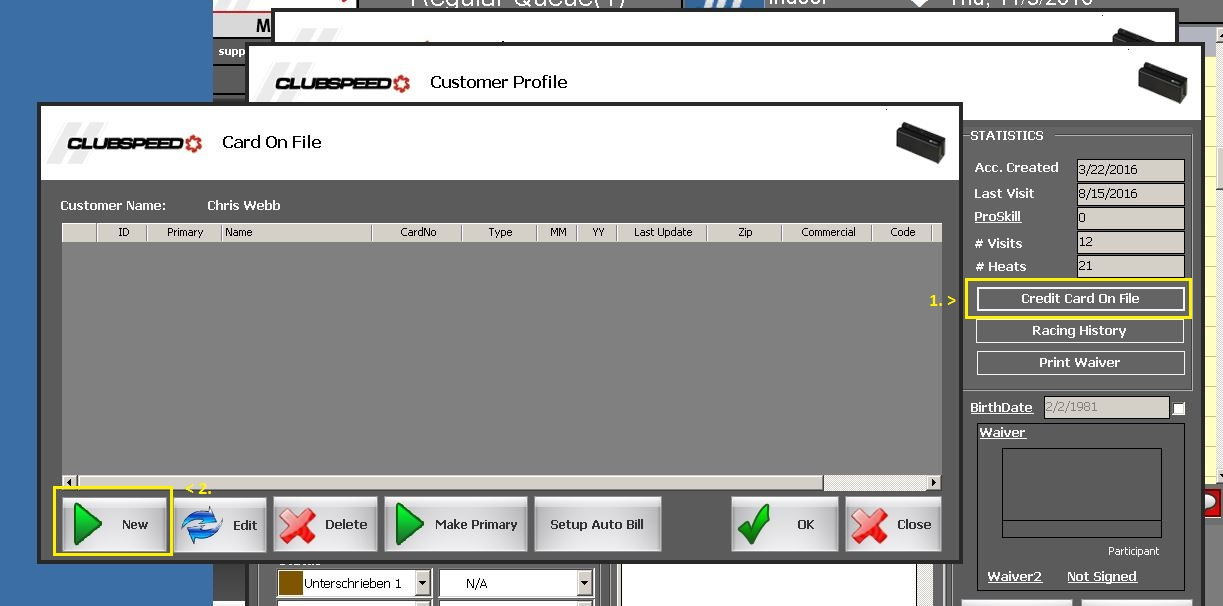
- Once you have entered the CC info, select the card from the list and click the ‘Make Primary’ Button, then click on ‘Setup Auto Bill’.
Step 3 - Create Auto Bill
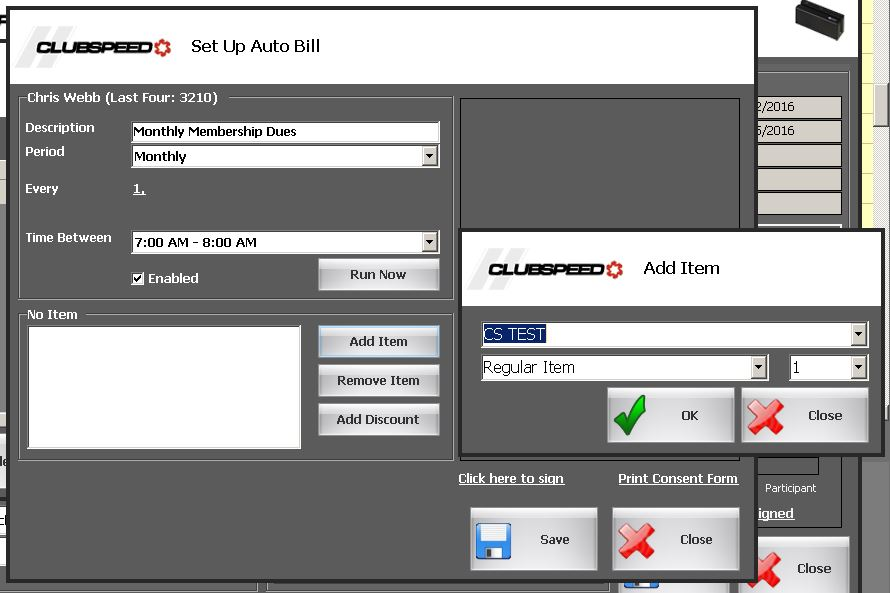
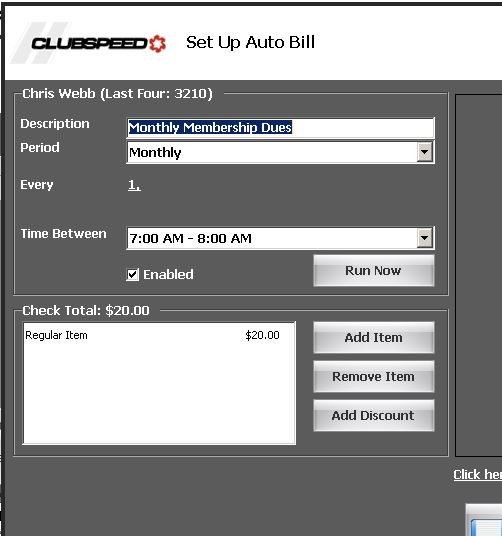
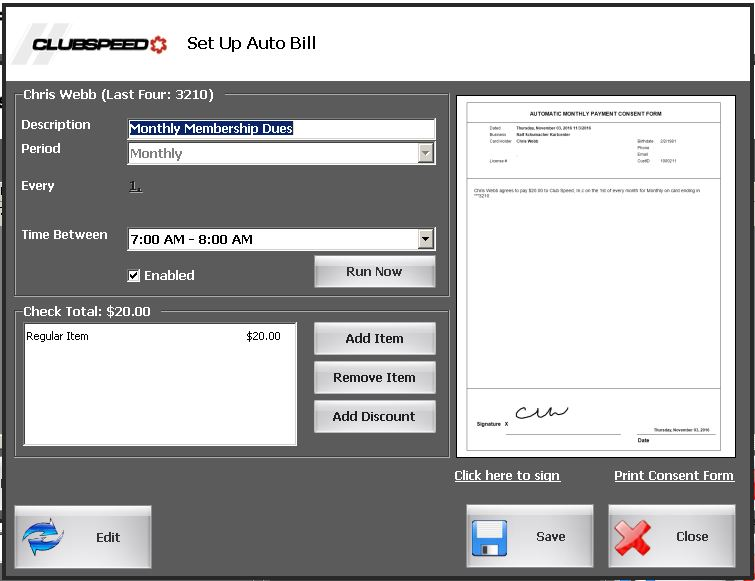
- To setup the auto bill function, enter in the description of what the charge is for. (EX: Monthly Membership Dues). Set how often (Period), what day (Every: 1st) they will be charged, and the time the will be charged on this day (7am the earliest).
- Make sure to check off that it is enabled!
- Next, you will want to add as many items as needed to be charged to the customer’s auto bill by clicking on the ‘Add Item’ button. Feel free to add discounts as well!
Applicable Items
- Membership Items
- Regular Items
- Credit Items (V. 22.3)
Not Applicable
- Game Cards
- Gift Cards
- Food Items
Step 4 - Sign Consent Form
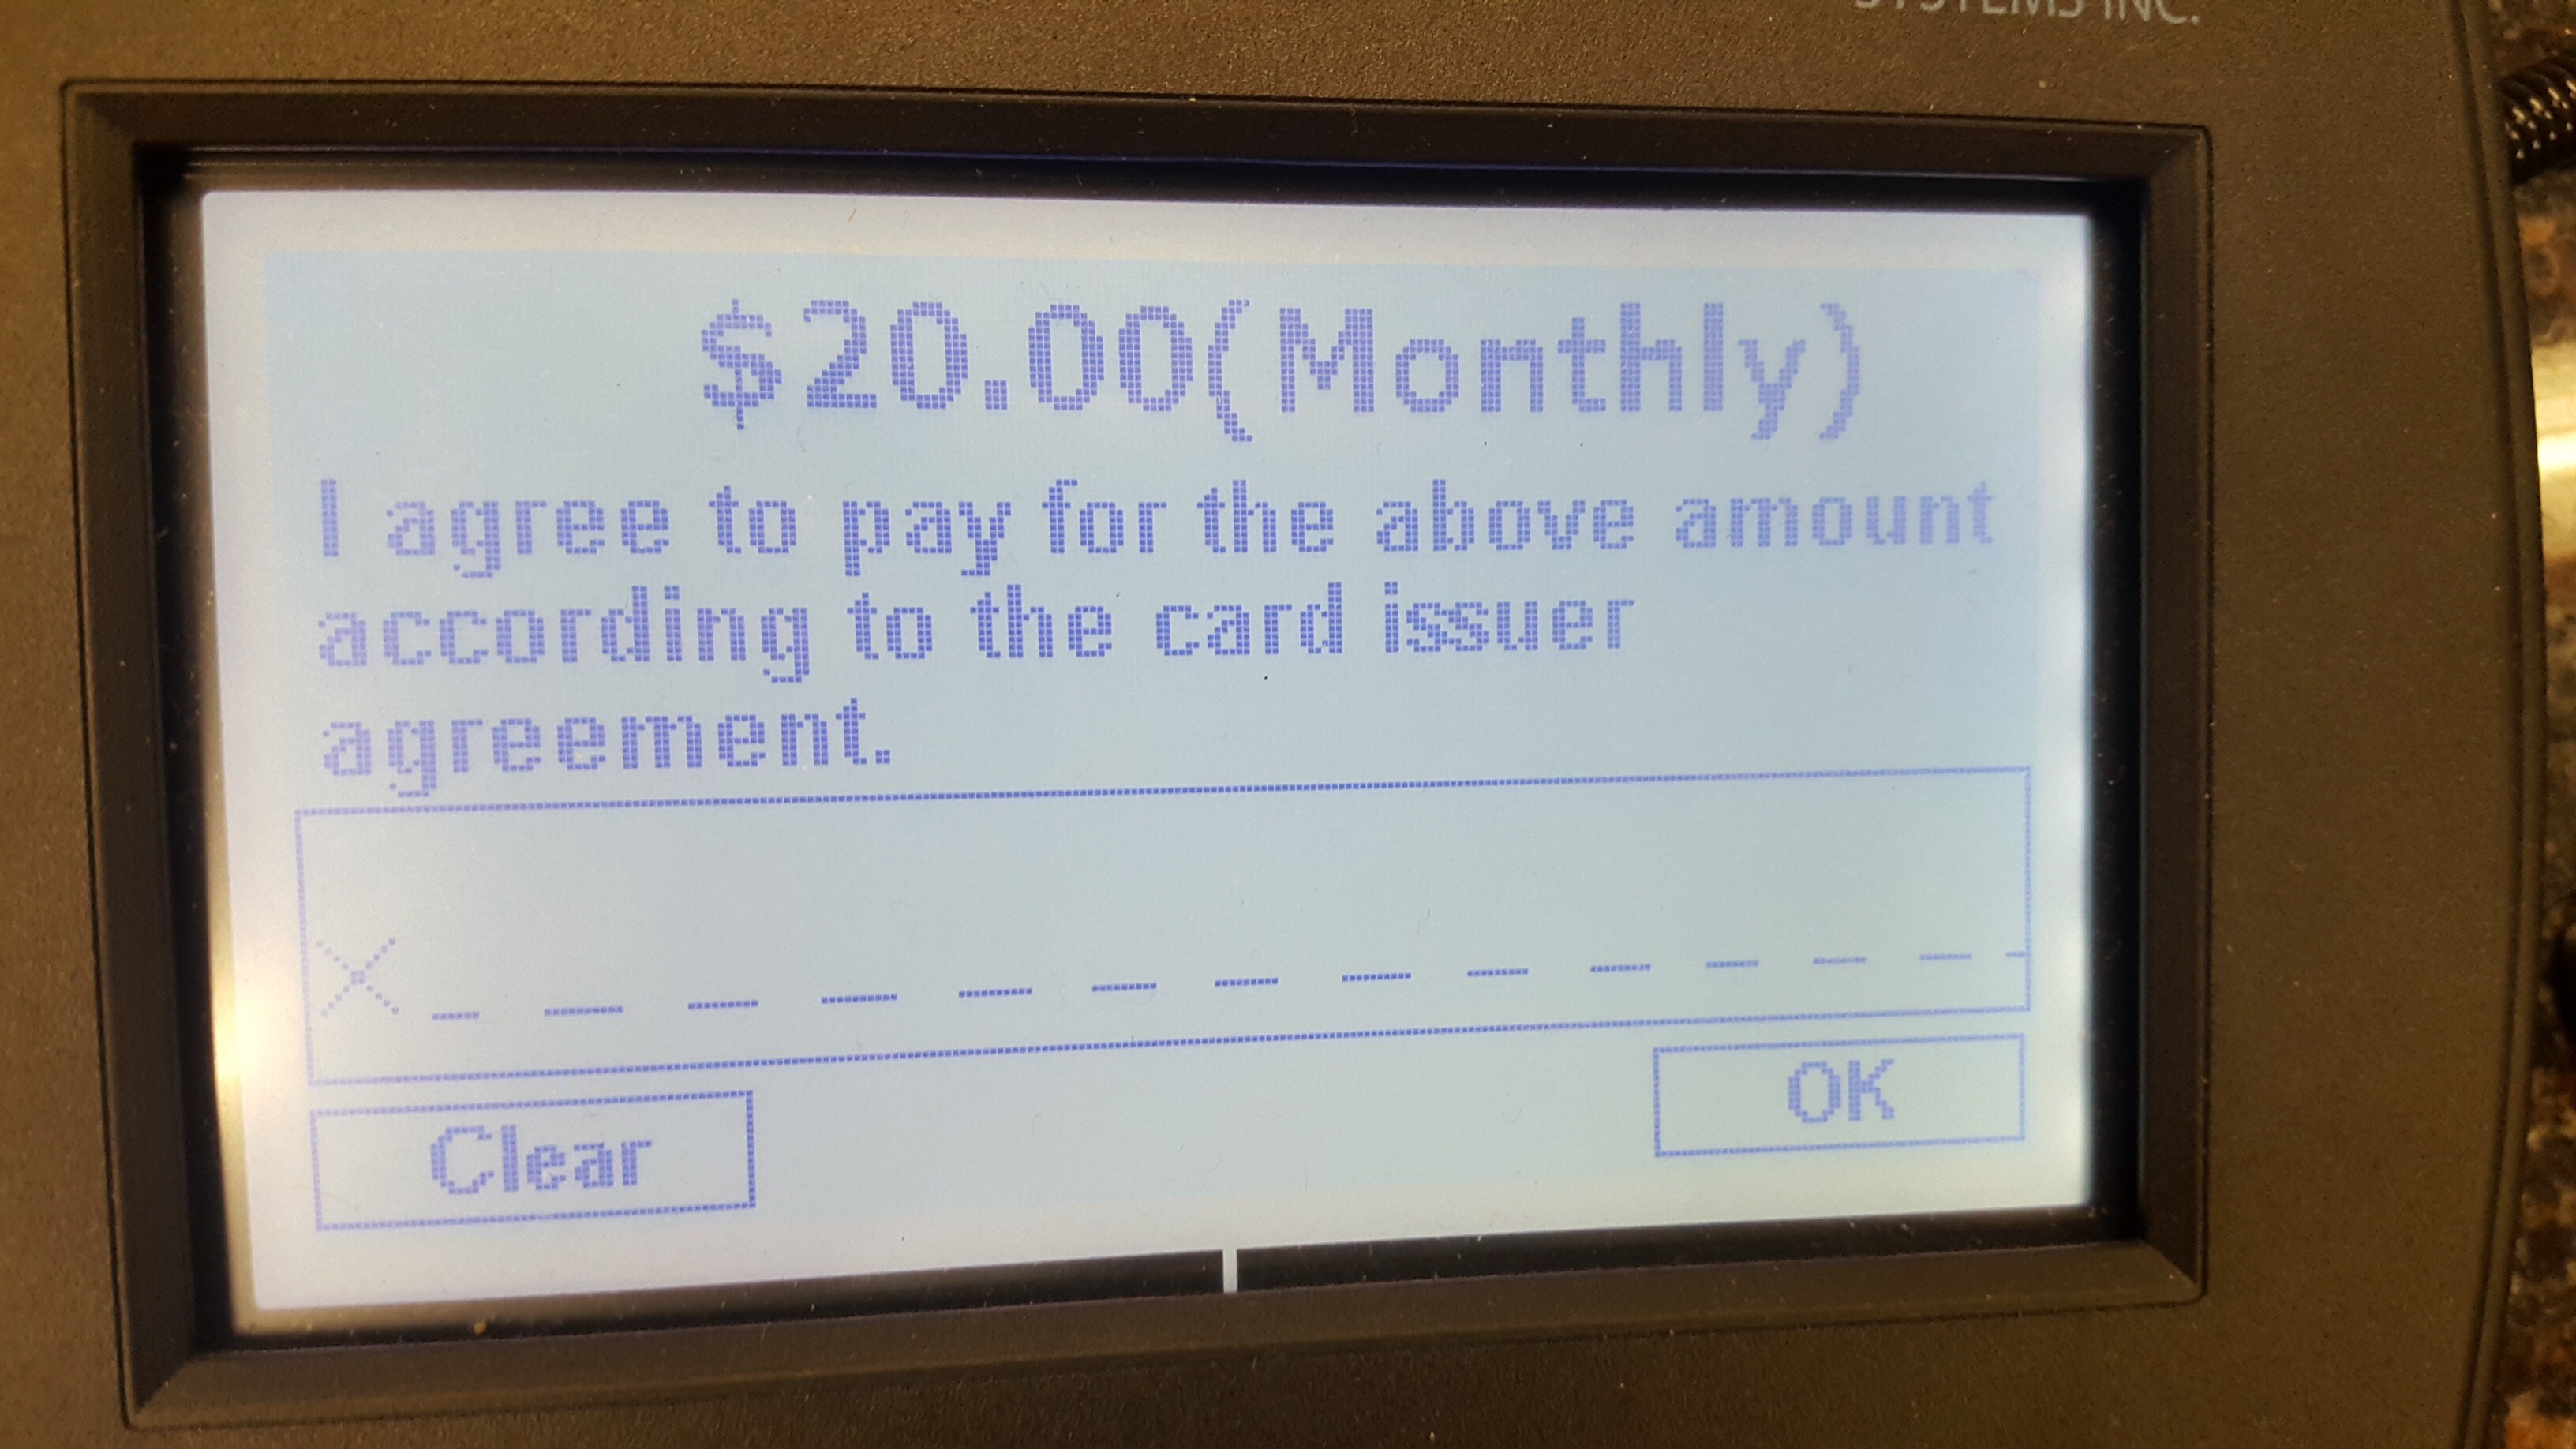
- Now that your auto bill is setup with a card on file, when the card will be charge, and the items to be charged for you will want to get the customer’s signature on the Auto Bill Consent form. Make sure you are at a terminal with a signature pad connected to it. Just above the SAVE button, click on the “Click here to sign” link. And you will get the below prompt on your signature pad for the customer.
TOPAZ Signature Pad
Clover
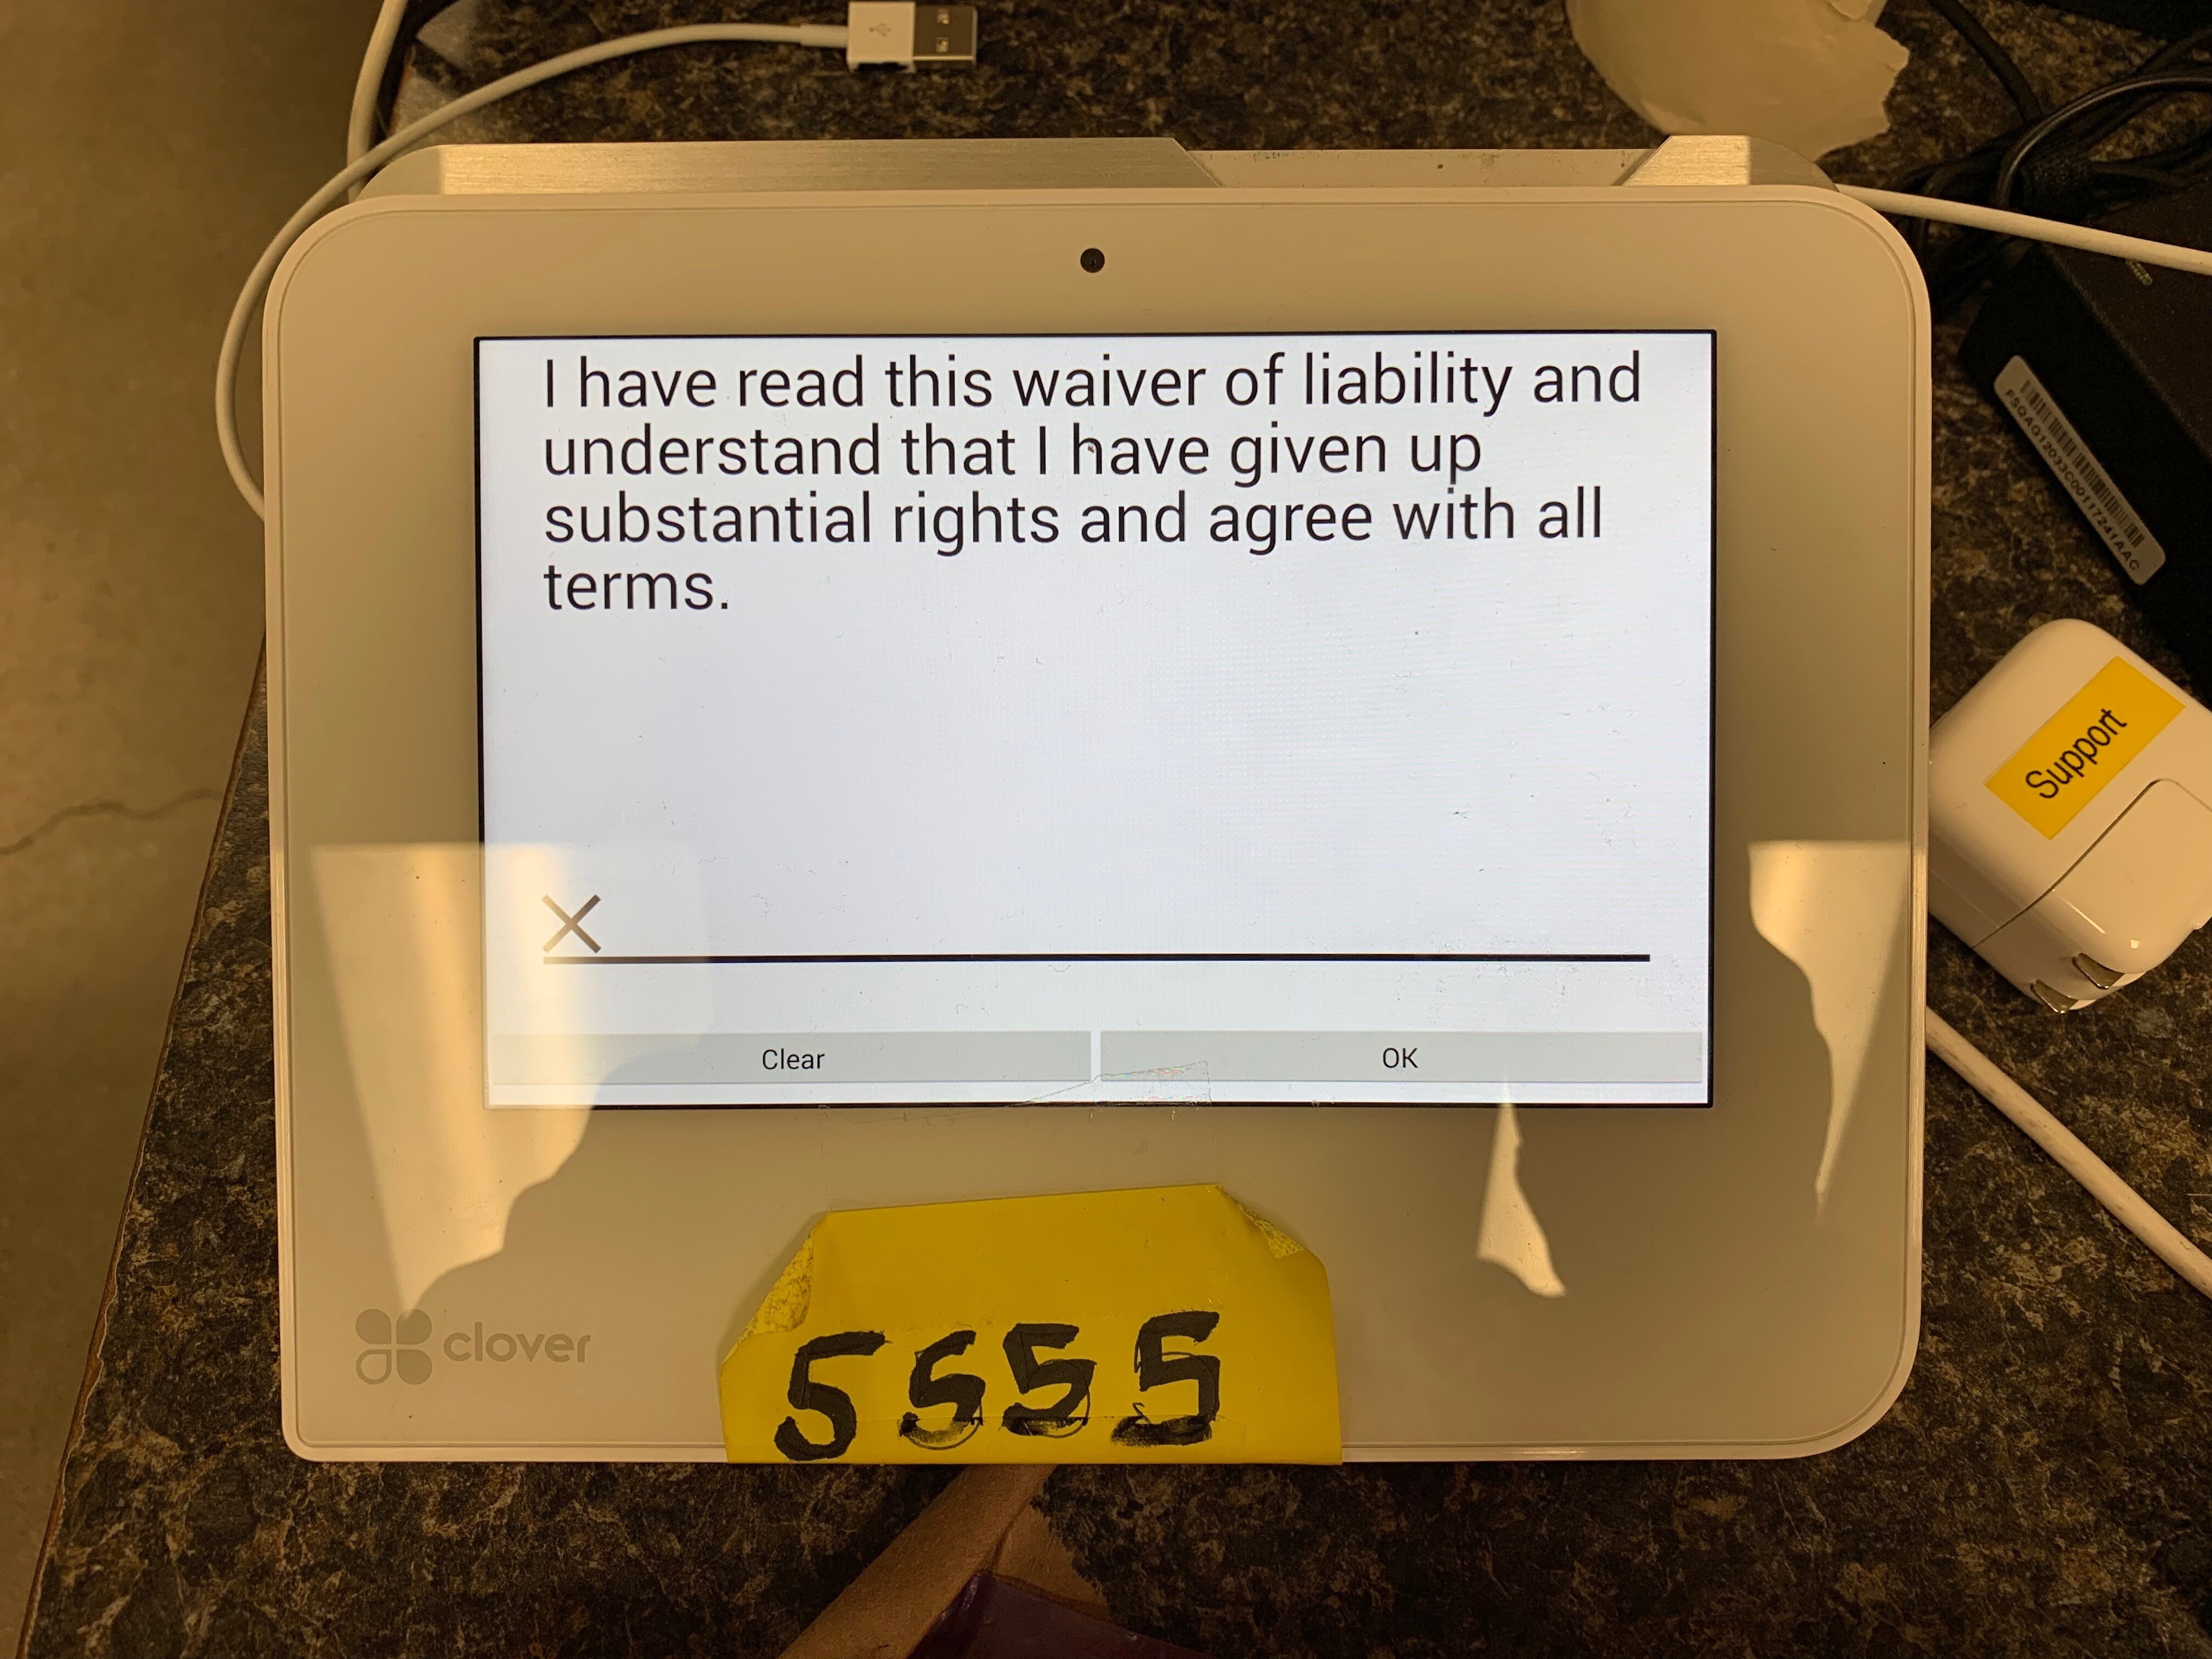
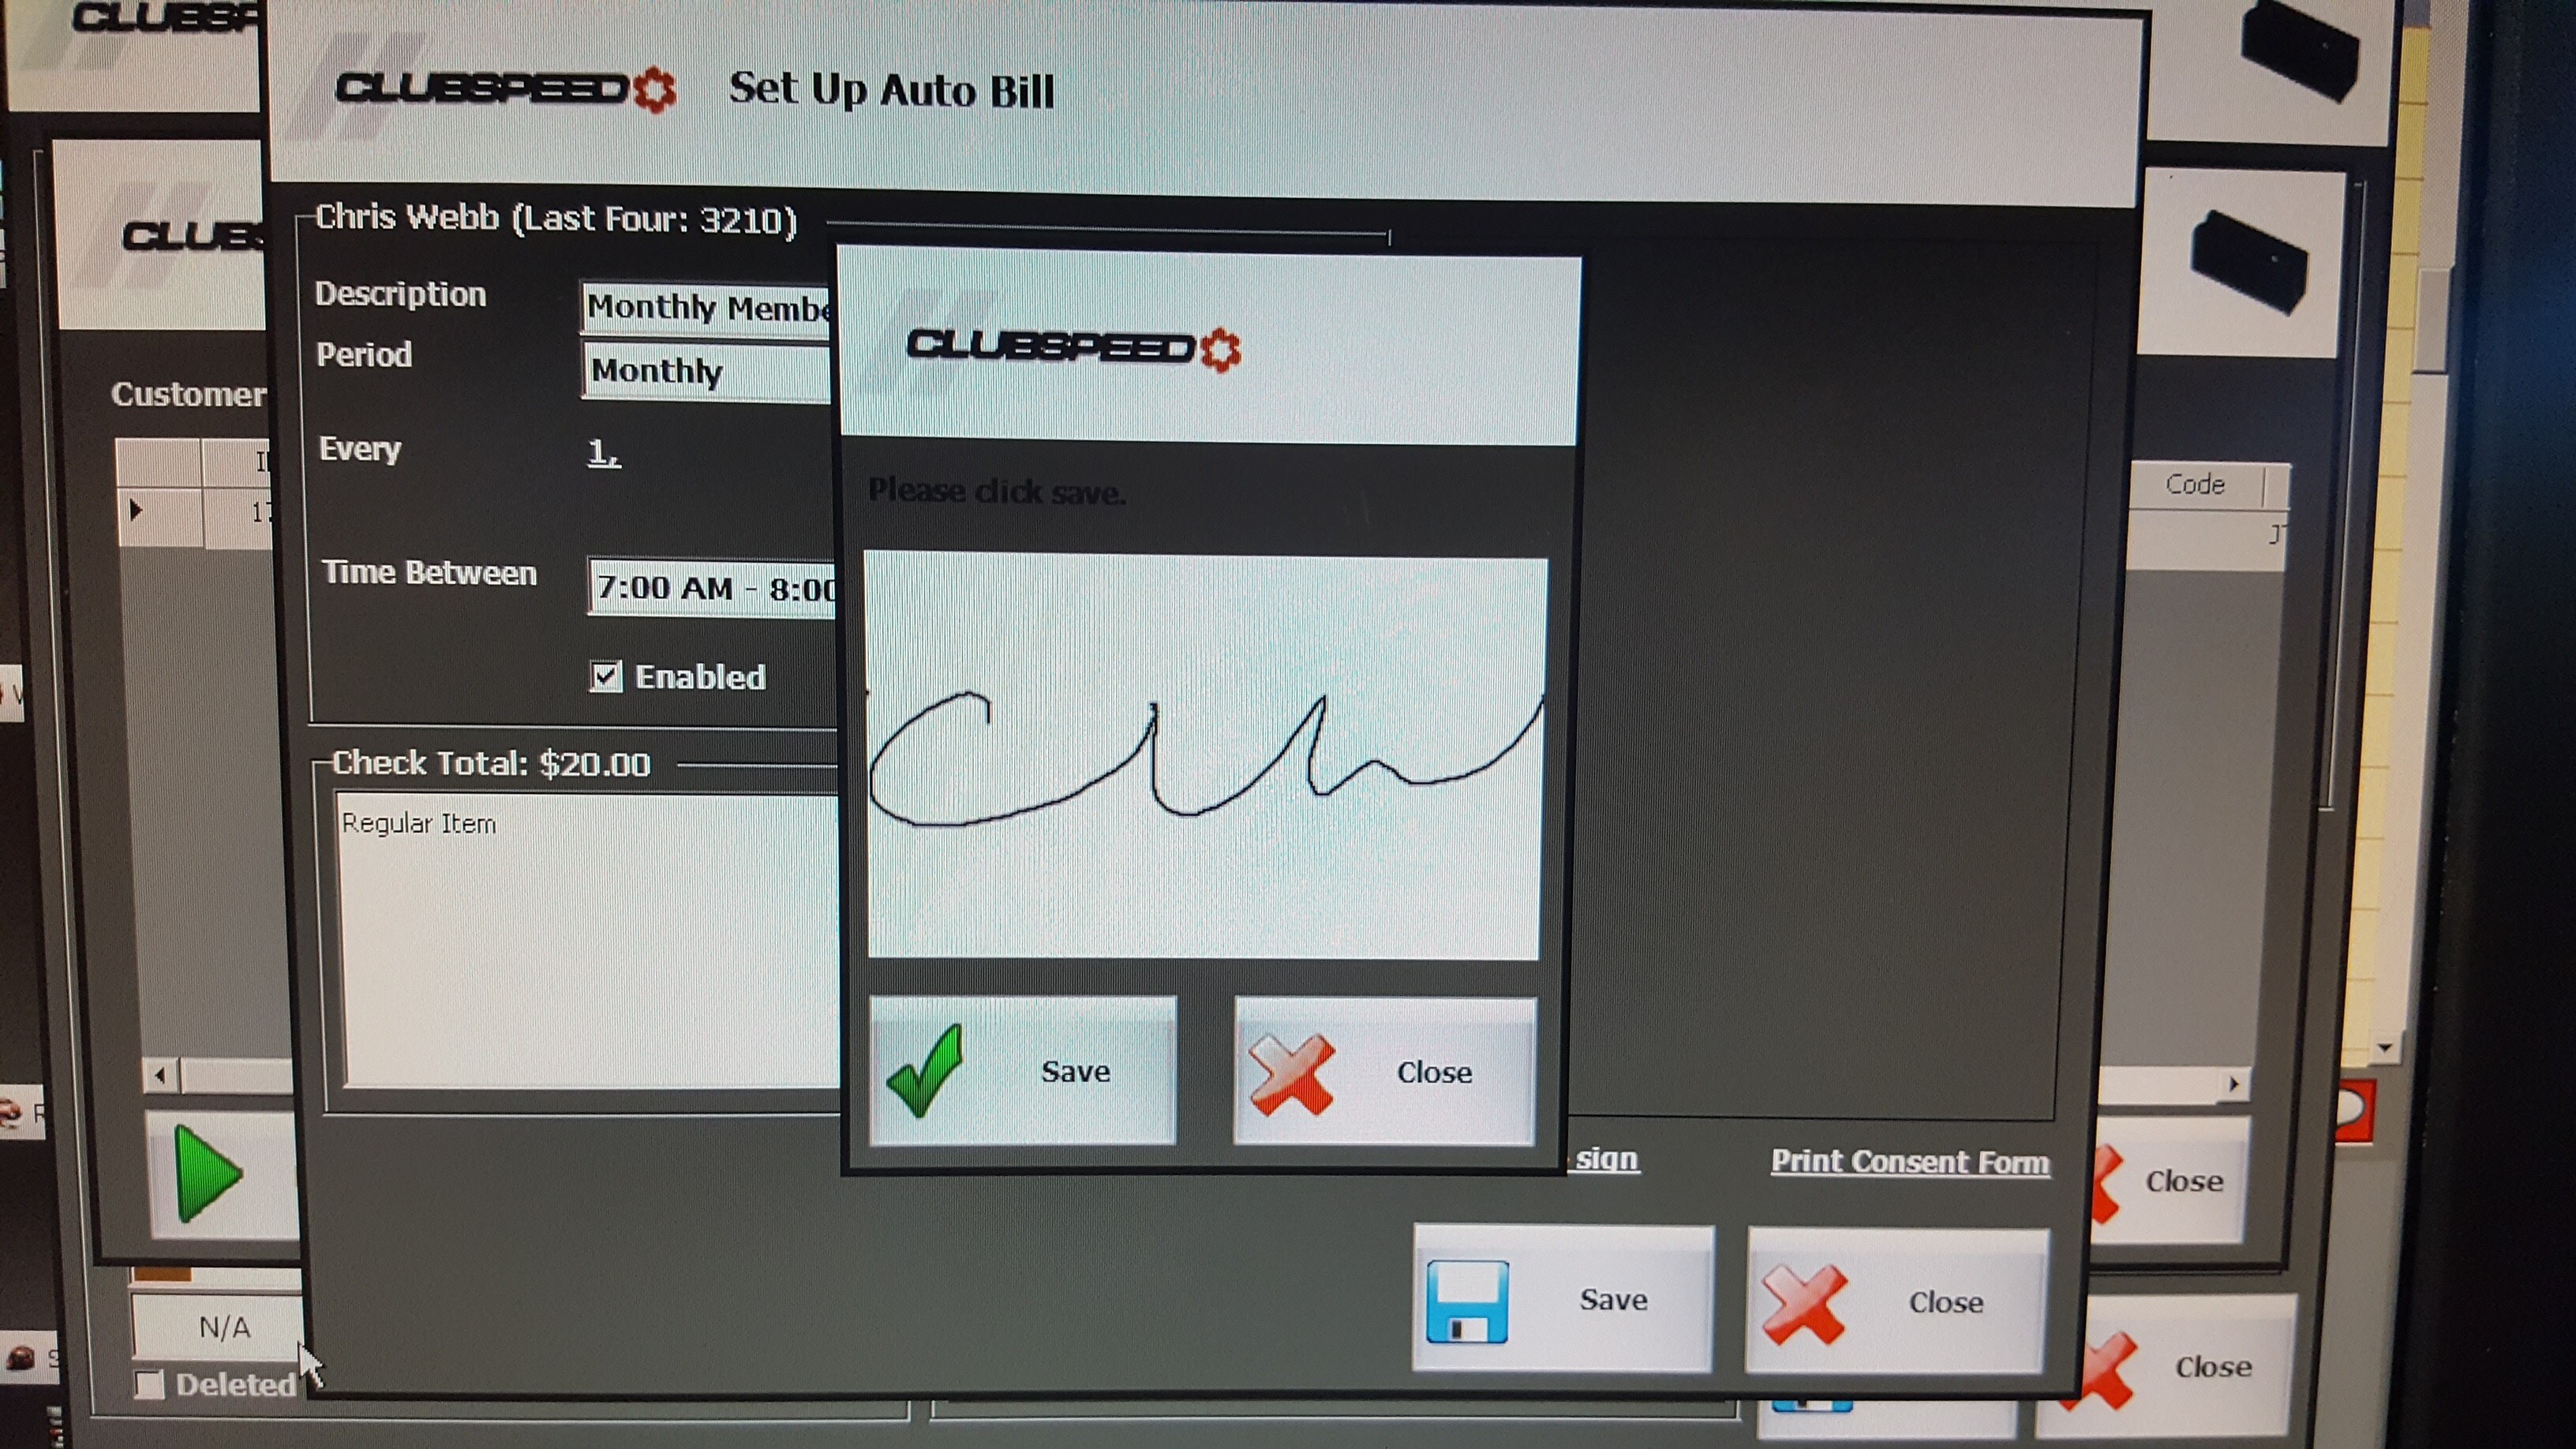
Once they have signed you will have a digitally saved - printable version of the consent form, just like you do with the racing waivers. Click SAVE!! This will close out the window, just click on the ‘Auto Bill’ button again to re-open the window.
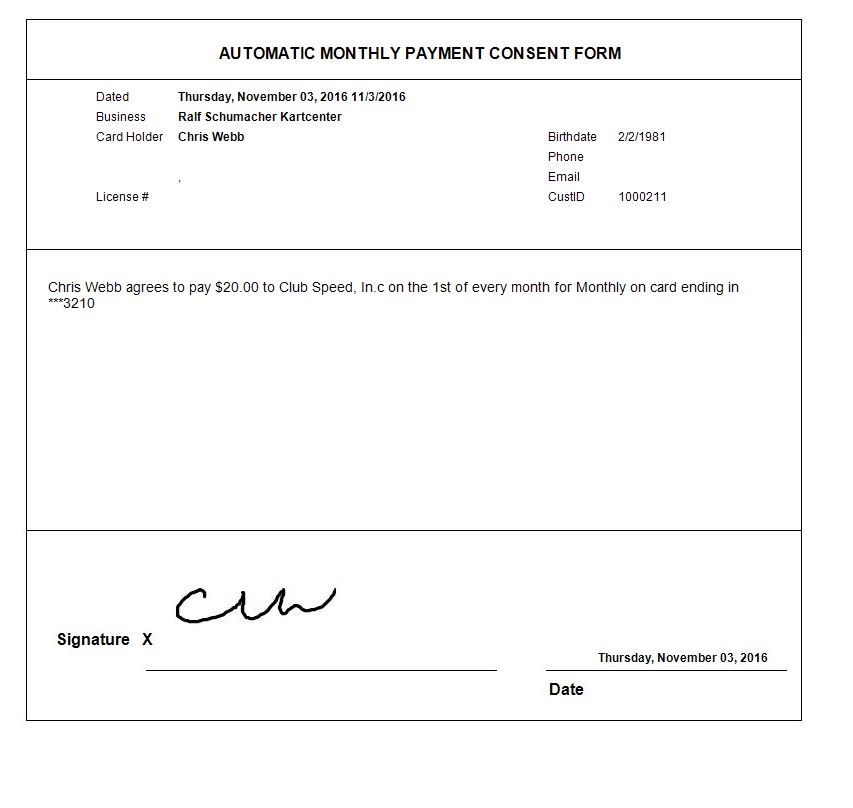
Here is what it will look like when you click ‘Print Consent Form’
Step 5 - Run Auto Bill
- If everything is in order, we suggest clicking on the ‘Run Now’ button for the first charge to make sure it does in fact go through properly!
Reporting
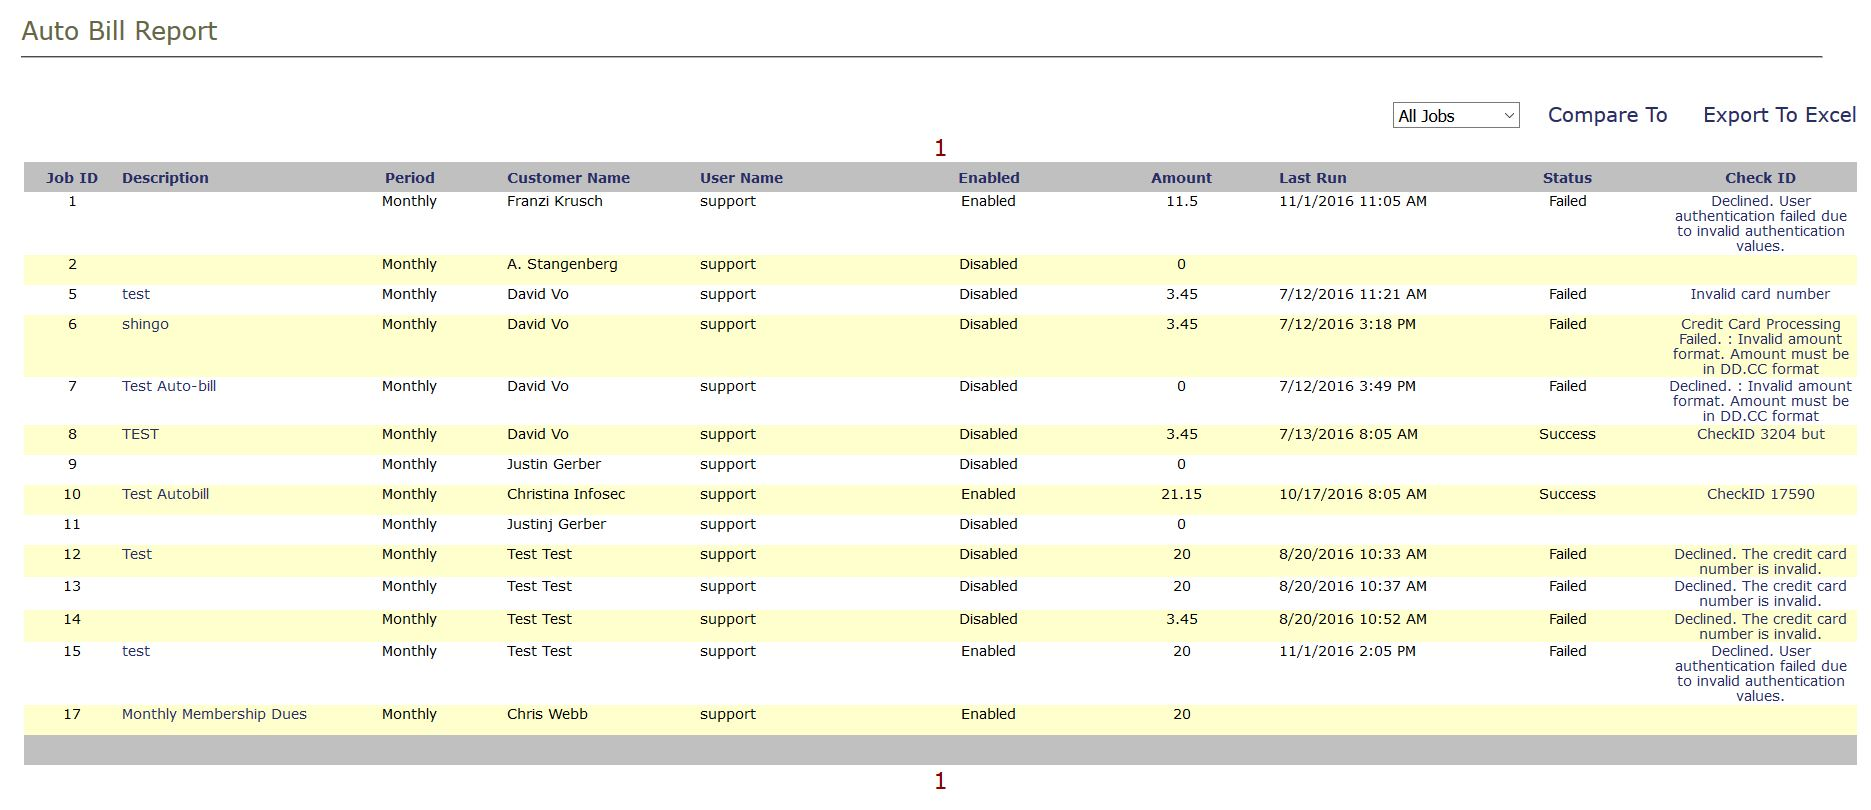
- You can now check if any of your scheduled Auto Bills have failed in the /sp_admin > Reports > Auto Bill Report
