Activities & Customizable Credits Setup
ABOUT: Activities & Customizable Credits
You can now have more than one kind of credit assigned to your customer's account! For instance, if a customer purchases a rock-climbing product, then it will add rock-climbing credits to their account, and those rock-climbing credits can be used to assign them to a rock-climbing activity only. Activities no longer need to be related to just racing. Adding new activities and credit types is fast & easy.
Credit Types
These credit types will be tied to a product that can be purchased in the POS. Once the product is purchased, it will assign one or more of these credits to the customer’s account. We will walk you through how to tie these credits to products later on. For now, let’s create a new credit type.
Add New Credit Type
-
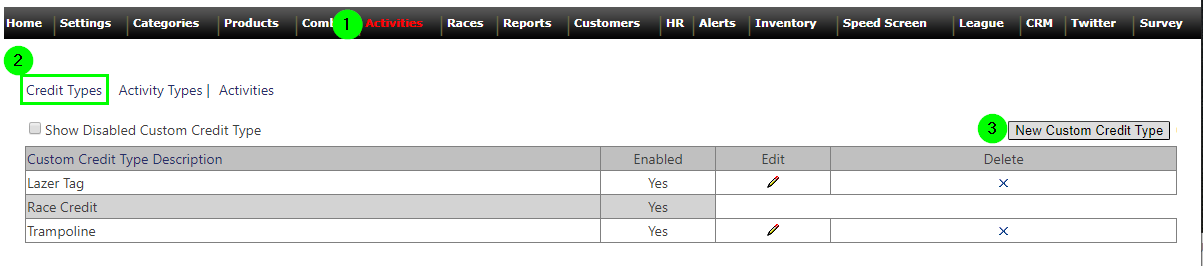
Login to SP_Admin and click on the Activities tab.
-
Click Credit Types
-
By default, Race Credit should be the only one listed
-
NOTE: This Credit Type CANNOT be deleted!
-
DO NOT create any additional Race Credit Types! Heats are automatically assigned to the default Race Credit.
-
-
-
Click the New Custom Credit Type button. This should add a new credit type to the grid called “New Custom Credit Type”.
-
Click the edit button and give it a name.
-
Click the save button.
Disable Existing Credit Types
-
Login to SP_Admin and click on the Activities tab.
-
Click Credit Types
-
Click the Edit button to the credit that you wish to disable.
-
Uncheck the enabled checkbox.
-
Click the save button.
Activity Types
These activity descriptions are the activity types that will be seen in the venue calendar. A few examples include racing, rock climbing, jumping, etc.
Add New Activity Description
-
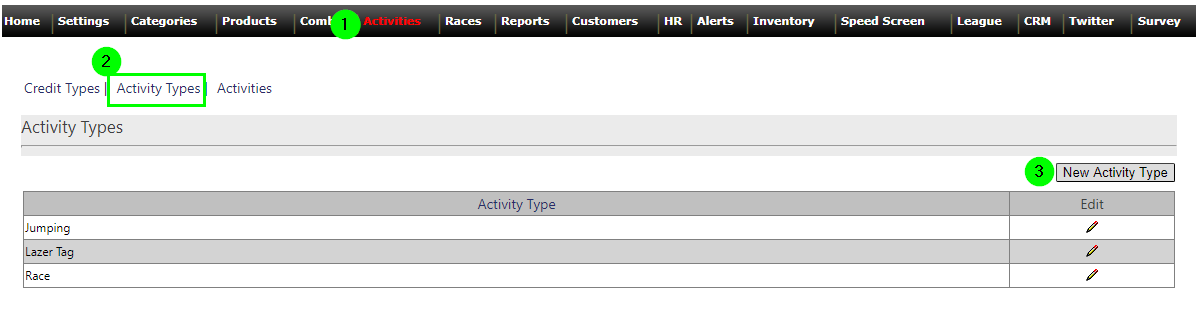
Login to SP_Admin and click on the Activities tab.
-
Click the Activity Types link. (By default, Race should be the only one listed.)
-
Click the New Activity Type button. This should add a new activity description in the grid called “New Activity”.
-
Give it a name and click the save button.
Activities
Once created, activities will be selectable in the venue calendar in SP_Intake. Please note that all activities should exclude racing. If you would like to modify racing information, then click the Races tab in SP_Admin.
Add New Activity
-
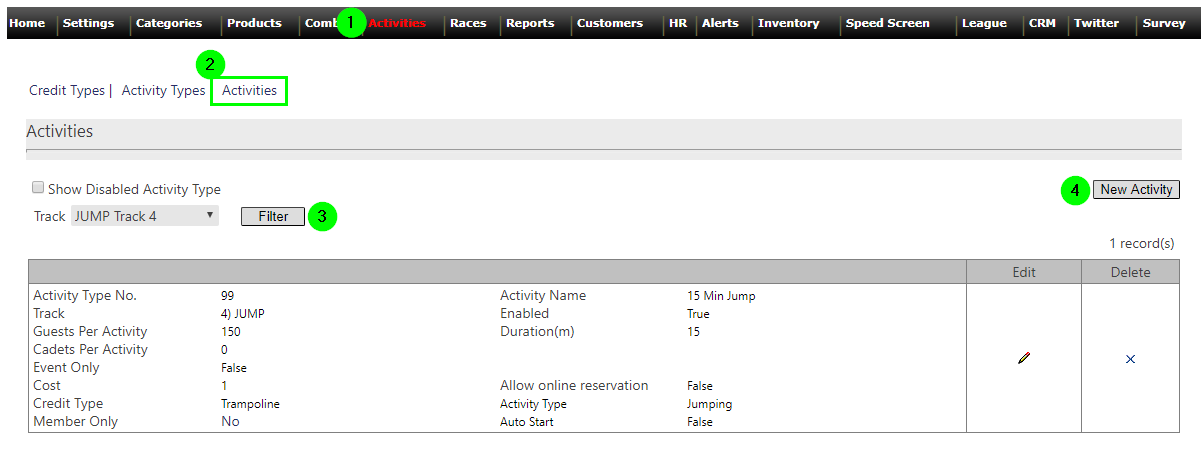
Login to SP_Admin and click on the Activities tab.
-
Click the Activities page.
-
Click the New Activity button. This should add a new activity called “New Activity Type”.
-
Click the edit button and give it a name and fill out all the fields.
-
Click the save button.
Activity Field Descriptions:

Delete Existing Activity
-
Login to SP_Admin and click on the Activities tab.
-
Click the Activities page.
-
Click the delete button on the activity that you wish to delete.