Configure Office365 SMTP Relay
Once we receive the customer's desired host, we can set up the relay. If you do not have the host from the customer, please obtain it from the following article:
https://support.clubspeed.com/a/solutions/articles/47001212594
Services:
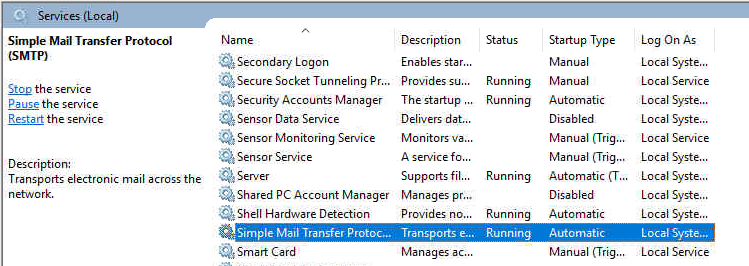
Ensure the "Simple Mail Transfer Protocol" service is not only running but also set to automatic.
IIS 6.0 Manager:
Expand the server on the left > right-click SMTP > Click properties
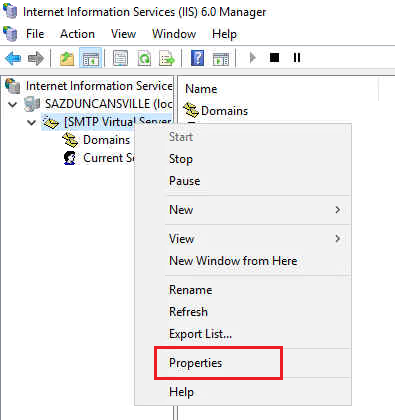
A new window pops up and at the top, select "Delievery", select "Advanced..."
Under the Smart Host section, paste the MX record/information of the primary domain that the customer provided.
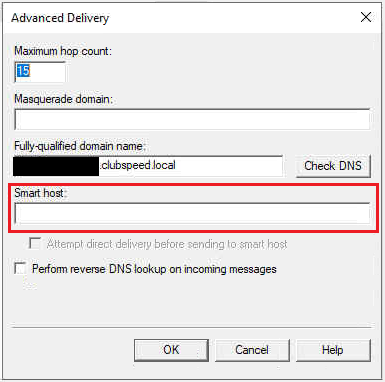
Click "OK" and then click "Apply"
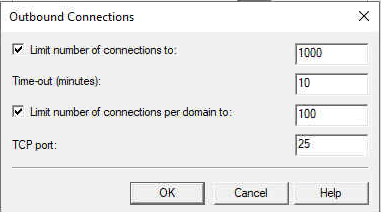
Now select "Outbound Connections..." and confirm the TCP Port is 25.
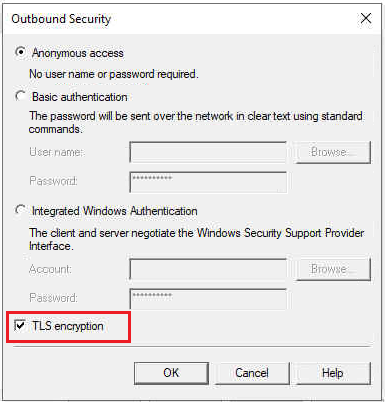
Now select "Outbound Security..." and ensure TLS encryption is ENABLED. This will ensure their email are encrypted over the Intenet.
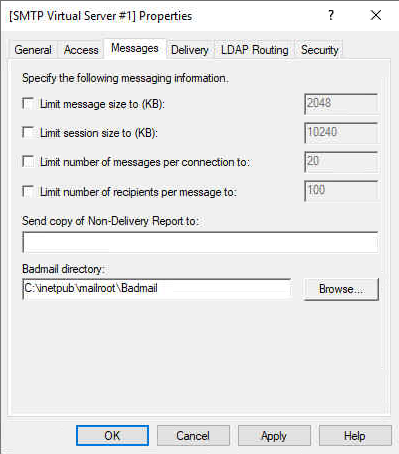
Under the "Messages" tab, remove all limitations by unchecking the boxes:
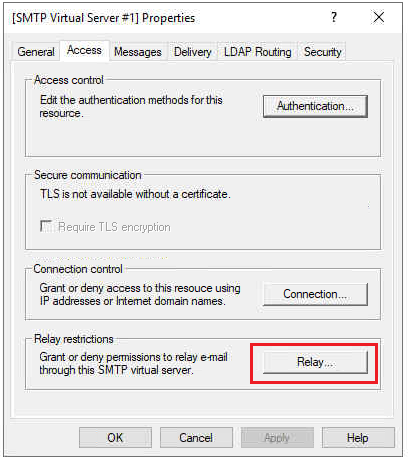
Under the "Access" tab, click the "Relay" button:
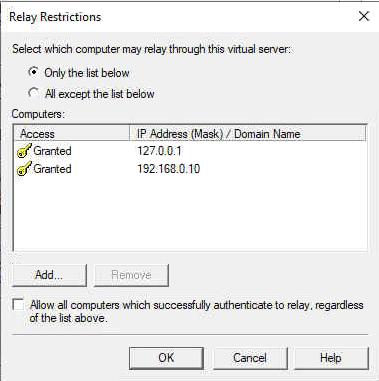
Depending on the server, this may vary; however, you can set the radio button to "All except the list below" and leave the field blank. This will accept all messages to relay to Office365. Alternatively you might have just the server's local IP and the localhost IP listed below but the otion will be "Only the list below". Either configuration is fine just ensure the server has access at all times.
Click "OK" and then click "Apply"
Note that if Port 25 is blocked on the network, the customer will have to allow/whitelist the port for the server.
Send a test email and follow up with the customer. This should be all that is required but if issues persist, continue reading.
Troubleshooting:
- Open Server Manager, select Tools and then select Internet Information Services (IIS) 6.0.
- Expand the current server, right-click the SMTP Virtual Server, and then select Properties.
- On the General tab, select Advanced > Add.
- In the IP Address box, specify the address of the server that's hosting the SMTP server.
- In the Port box, enter 587 and select OK.
- On the Access tab, do the following:
- Select Authentication and make sure that Anonymous Access is selected.
- Select Connection > Only the List Below, and then specify the IP addresses of the devices that will be connecting to the SMTP server, such as printers.
- Select Relay > Only the List Below, and then specify the IP address of the devices relaying through this SMTP server
- On the Delivery tab, select Outbound Security, and then do the following:
- Select Basic Authentication.
- Enter the credentials of the Office 365 user who you want to use to relay SMTP mail.
- Select TLS Encryption (ensuring it is enabled).
- Select Outbound Connections, and in the TCP Port box, enter 587 and select OK.
- Select Advanced and specify SMTP.office365.com as the Smart Host.
- Restart the IIS service and the SMTP service.