Clover's "Ping Retries Before Disconnect"
This article will go through the process of adjusting a Clover's "Ping Retries Before Disconnect" setting
Step 1: Navigate the menus to access the "Network Pay Display" app
Step 2: Access the Network Pay Display application's settings.
Step 3: Adjusting the settings of the device within "Network Pay Display"
Step 1: Navigate the menus to access the "Network Pay Display" app
The default screen most people will see is the "Welcome to [LicenseName] Screen"

If you are at this screen, tap all 4 corners of the device to gain access to all the available apps on the Clover device.
If you see the Sale, Refund, and Transaction button you now just need to swipe around to find the Network Pay Display app which is the purple circle icon with 2 computers inside the bubble.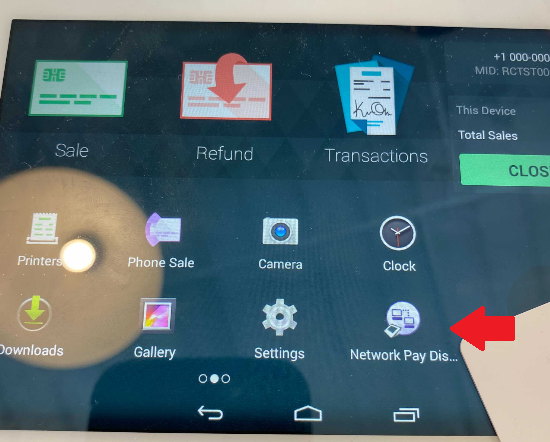
Step 2: Access the Network Pay Display application's settings.
With the application now open, located at the top left of the screen, there should be 3 lines indicating a collapsed menu icon also known as the "Hamburger Button".
By clicking the hamburger button, you can now select settings to finally gain access to the Clover's "Ping Retries Before Disconnect".

Step 3: Adjusting the settings of the device within "Network Pay Display"
By default, this value is set to 3. We always highly recommend you adjust the value from the range of 12-15.
Once the value has been changed, press the green "Configure and Restart Server" button. The loading time varies as it may take 30 seconds to just a short blink on the screen.

Navigate back to the start menu and resume the pairing process by pressing the "start" button.
// The purpose of setting the ping retries to a higher value allows the Clover more time to communicate with Clubspeed to properly read/write information from each transaction back into the server's database.